Wuben X2 Copper Torch Review

Wuben X2 Copper#
- Specifications
- Introduction
- Torch in use
- Build quality
- LED, bezel, lens, reflector and beam
- Size and comparison
- User interface
- Batteries and charging
- Performance
- Beamshots
- Conclusion
- Price
- Product page
Specifications#
| Brand/model | Wuben X2 Copper |
|---|---|
| LED | 3x Samsung LH351D |
| Maximum lumens | 1,800 lm |
| Maximum beam intensity | 4,100 cd |
| Maximum throw | 182 m |
| Battery | Built-in 2000mAh |
| Onboard charging | Yes (USB-C) |
| Material | Copper, Stainless steel |
| Modes | 4 |
| Blinkies | Strobe, SOS |
| Reflector | OP |
| Waterproof | IP68 |
| Review date | April 2023 |
Introduction#
Wuben have been around for a while and produce many different types of torches ranging from small EDC torches to large professional torches that you might use for search and rescue purposes.
I noticed a new EDC range of torches by Wuben appear on Kickstarter. This range is particularly unique because they have moved away from the traditional cyclindrical shape and opted to build EDC torches in the shape of a rectangle.
An opportunity to review a prototype came up. While testing the prototype and providing a lot of feedback, I asked fellow enthusiasts what their thoughts are on the X0, X1 and X2. They had overwhelmingly positive feedback about the user interface and design and highly recommended this range of EDC torches.
I asked Wuben if I could review the Wuben X2 Copper and they kindly sent this torch for review. I have not been paid for this review nor have I held back my opinions of this torch.
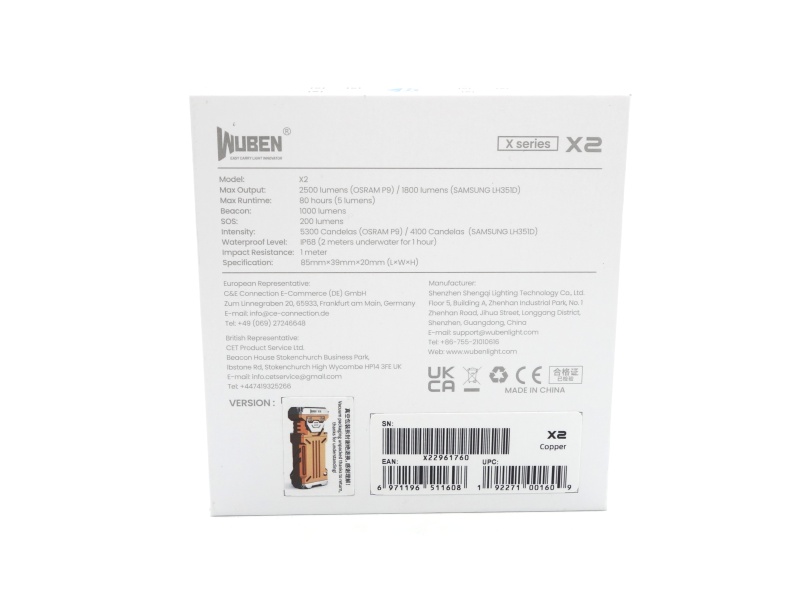
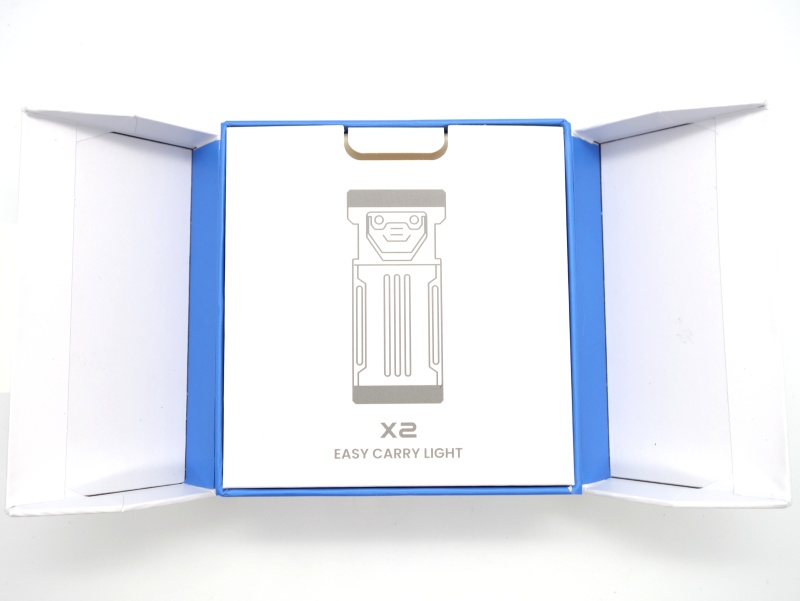
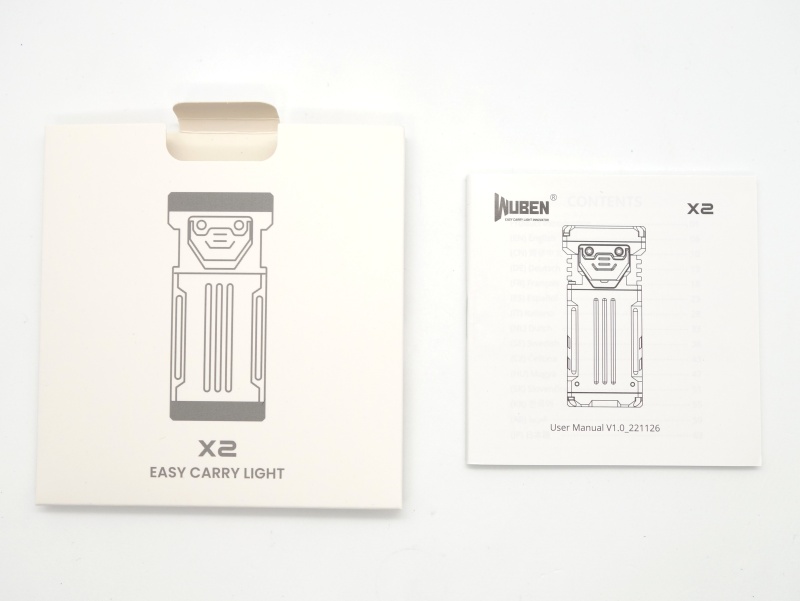
Packaging#
The Wuben X2 comes in a fancy Wuben branded box. The white box with a Wuben logo looks simple but it opens up from the middle. Nice first impression!
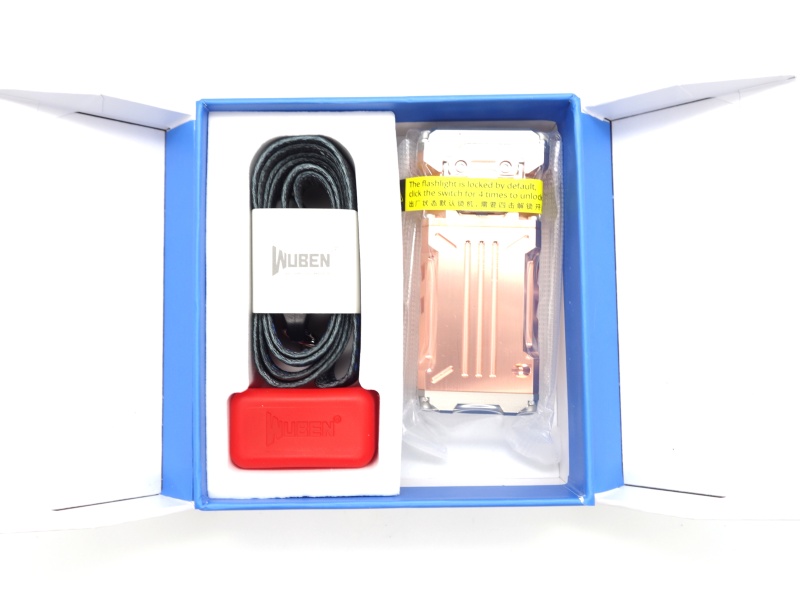
The following was included in the box:
- Wuben X2 Copper
- USB-A to USB-C cable (lanyard)
- Red diffuser
- User manual


Torch in use#
Weighing in at 244g, the Wuben X2 Copper is pretty heavy for a compact EDC torch!
I affectionately refer to it as a “brick” because it could hurt if it landed on your toes.
The copper looks very shiny when taking it out of a vacuum sealed plastic bag.
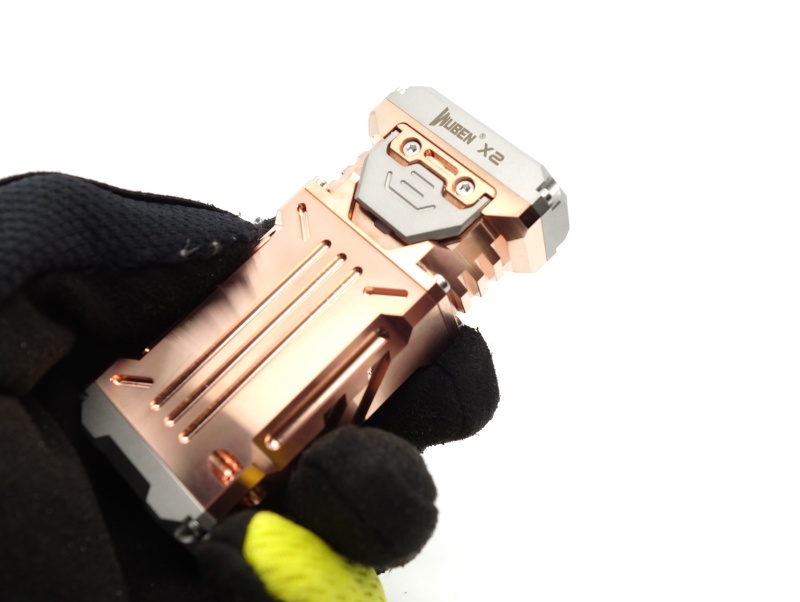
I wore gloves initially but a patina started to form after a few days.
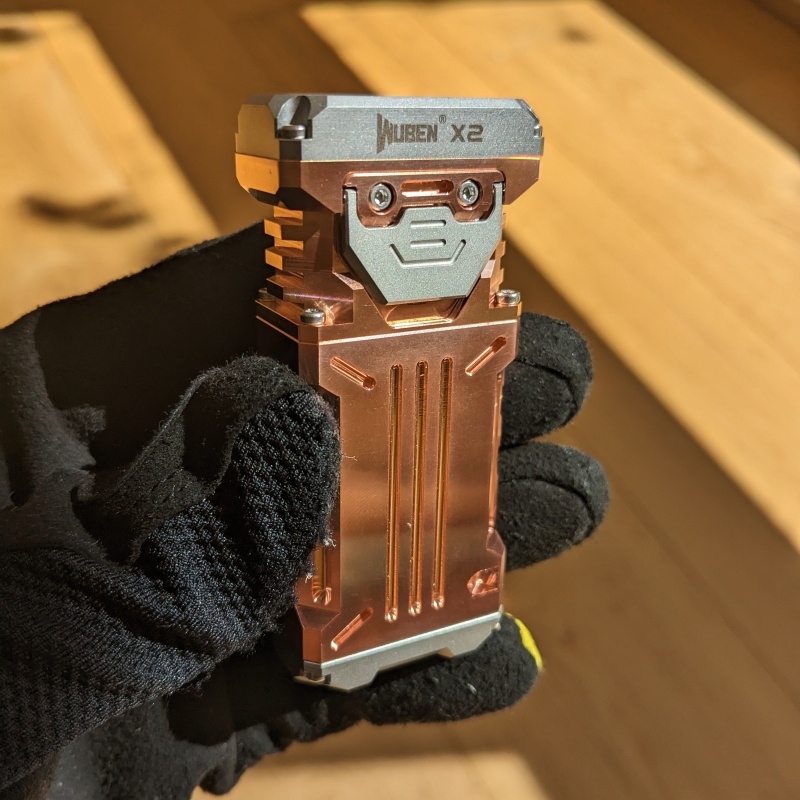
Once you see it, you can’t unsee:
•ᴗ•
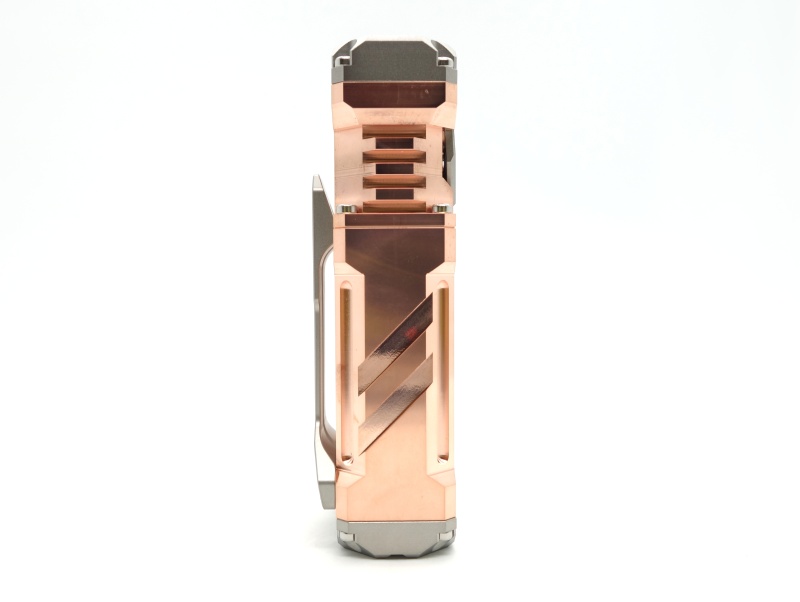
The X2 can tailstand. It has a pocket clip. And it even has a lanyard hole.
The pocket clip is pretty stiff and takes a bit of care when clipping on and off a pocket.

I found myself simply putting the X2 in my pocket for quick access instead of clipping it to my pocket while using it over the past two weeks. And yes, sorry, I had it in a pocket with keys so it has been scratched. Torches are made to be used!
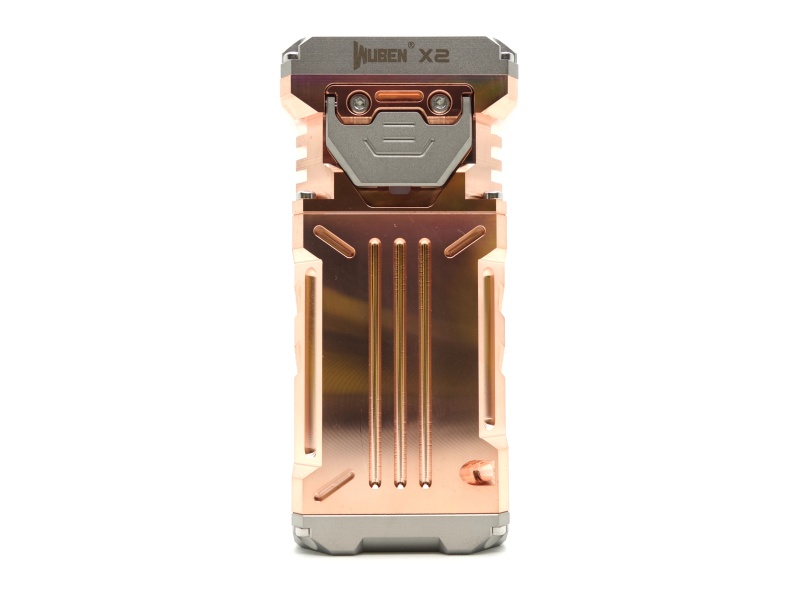
Build quality#
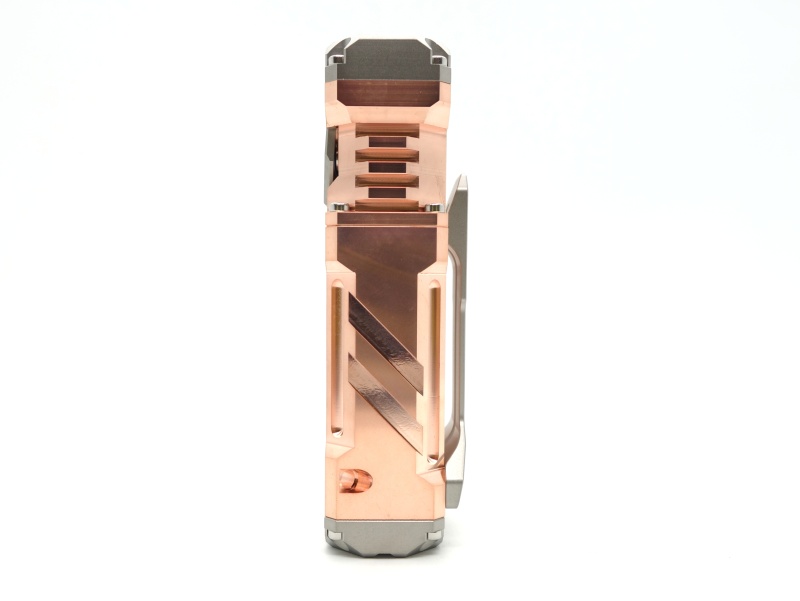
The Wuben X2 Copper is mostly a large chunk of copper. It has a stainless steel bezel, switch cover, pocket clip and tail.
I felt 4 sharp edges when I took my gloves off and picked up the Wuben X2 Copper. The edges need to be chamfered. I used a file from a Leatherman and a polishing sponge from ReyLight to make the edges smooth.
The switch has a unique feel and sound. It almost sounds like rattling metal. I would not say that it is unsatisfying. It is different. It is halfway between a loud “click click” switch and a completely silent e-switch.
There are multiple tritium slots for those who would like to personalise their torch.
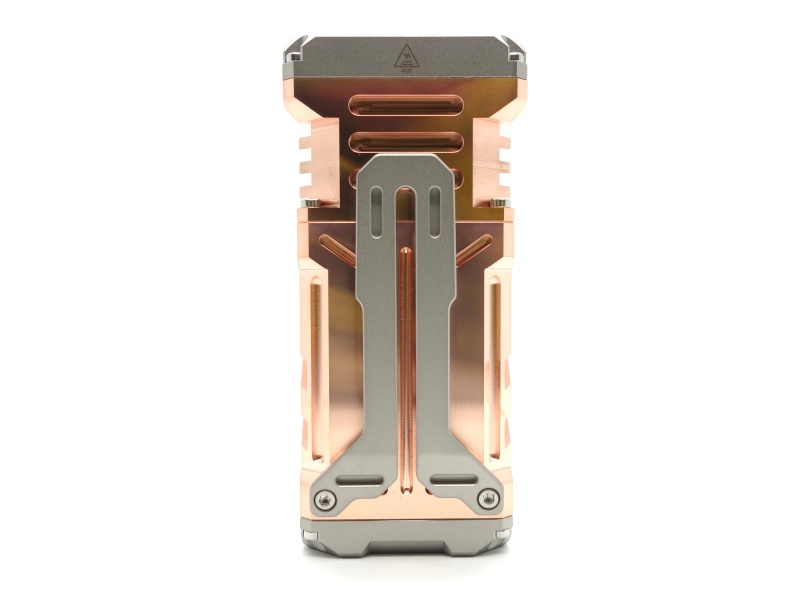

“Do not disassemble” can be found on the bottom of the torch. Challenge accepted! But seriously, it is easy to open up and modify.
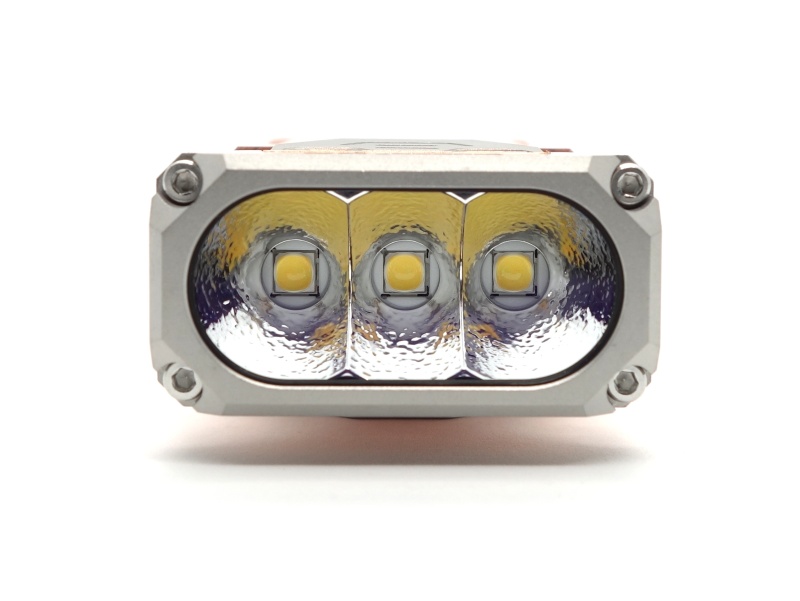
LED, bezel, lens, reflector and beam#
The Wuben X2 Copper has three Samsung LH351D emitters sitting behind a glass lens with an anti-reflective coating.
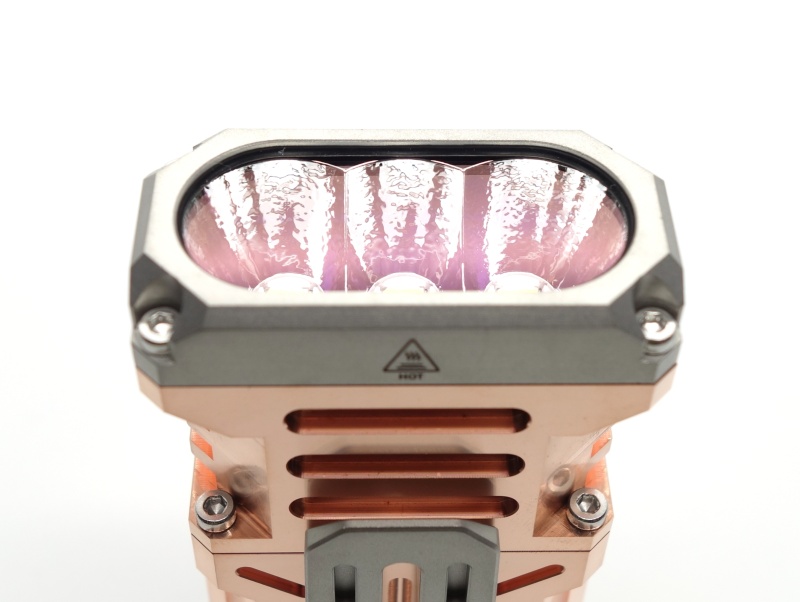
I unscrewed four 1.5 hex screws and lifted the bezel off the head.
The orange peel reflector lifted out to reveal three centering gaskets around each emitter.
A rubber gasket was found sitting between the head and the bezel to provide water resistance.
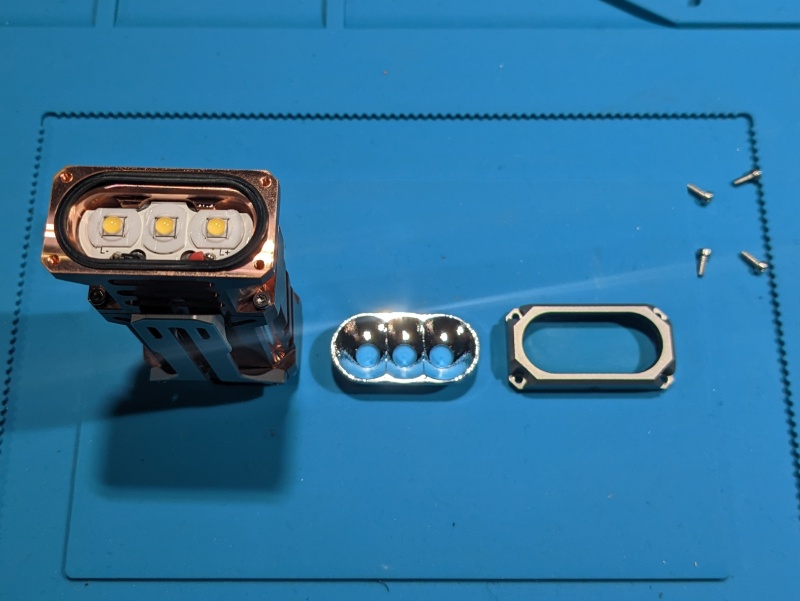
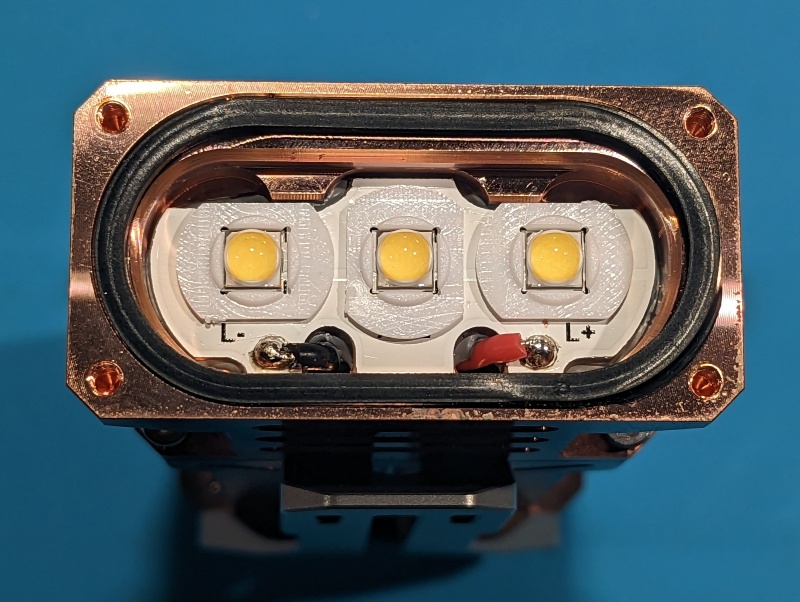
The MCPCB looks relatively easy to remove for performing an emitter swap.
CCT, CRI, and duv#
I have taken Correlated Colour Temperature (CCT) and Colour Rendering Index (CRI, RA of R1-R8) measurements with the torch positioned one metre away from an Opple Light Master Pro III (G3).
The CCT is around 4648K. The CRI is around 96.
The Delta u, v is slightly positive (green).
The floody beam looks relatively nice and warm outside. It has a rectangular shape to it.
Measurement 1#
| Mode | CCT (K) | CRI (Ra) | x | y | Duv |
|---|---|---|---|---|---|
| Low | 4586 | 96.2 | 0.3583 | 0.3638 | 0.0010 |
| Med | 4601 | 96.3 | 0.3579 | 0.3640 | 0.0013 |
| High | 4641 | 96.1 | 0.3568 | 0.3649 | 0.0021 |
| Turbo | 4765 | 95.5 | 0.3533 | 0.3670 | 0.0044 |
Measurement 2#
| Mode | CCT (K) | CRI (Ra) | x | y | Duv |
|---|---|---|---|---|---|
| Low | 4558 | 95.7 | 0.3587 | 0.3609 | -0.0006 |
| Med | 4587 | 96.1 | 0.3584 | 0.3643 | 0.0012 |
| High | 4621 | 96.0 | 0.3574 | 0.3651 | 0.0020 |
| Turbo | 4740 | 95.4 | 0.3541 | 0.3674 | 0.0043 |
Calculate Duv from CIE 1931 xy coordinates
Dimensions and size comparison#
Dimensions#
I took the following measurements using a vernier caliper.
| Measurement | Unit (mm) |
|---|---|
| Length | 84.5 |
| Height | 20.0 |
| Height with pocket clip | 29.85 |
| Head width | 39.1 |
| Body width | 35.0 |
Weight#
I took the following measurements using a digital scale.
| Weight | Unit (g) |
|---|---|
| Wuben X2 Copper | 244.58 |
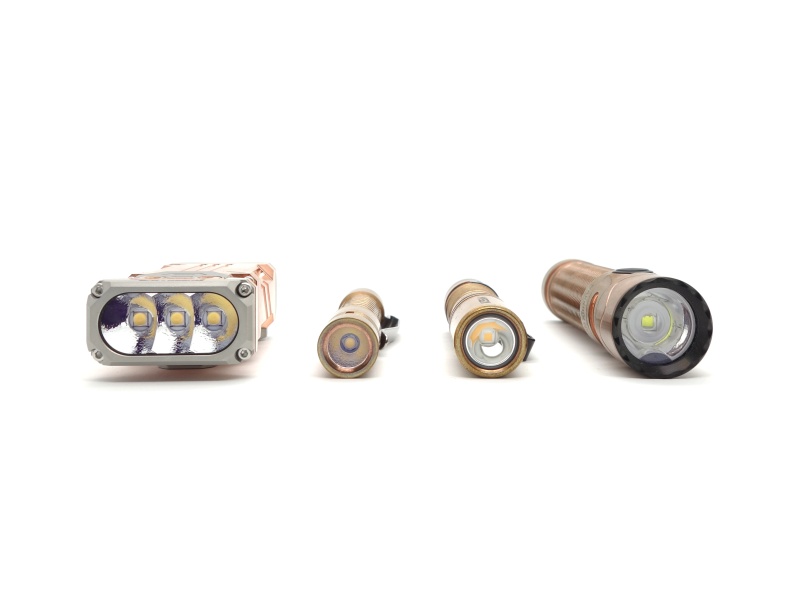
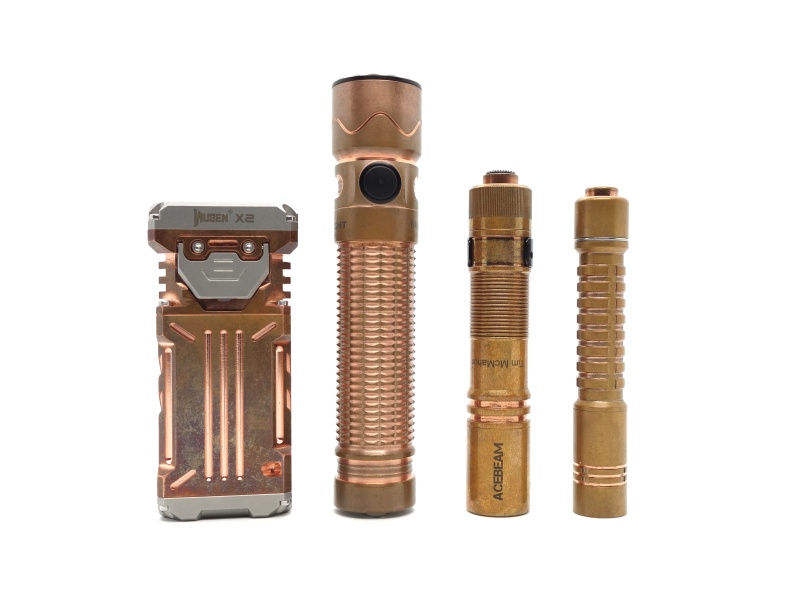
Size comparison with its competition#
From left to right: Wuben X2 Copper, ReyLight Pineapple Mini Copper, Acebeam Pokelit AA Copper, Olight Warrior Mini 2 Copper
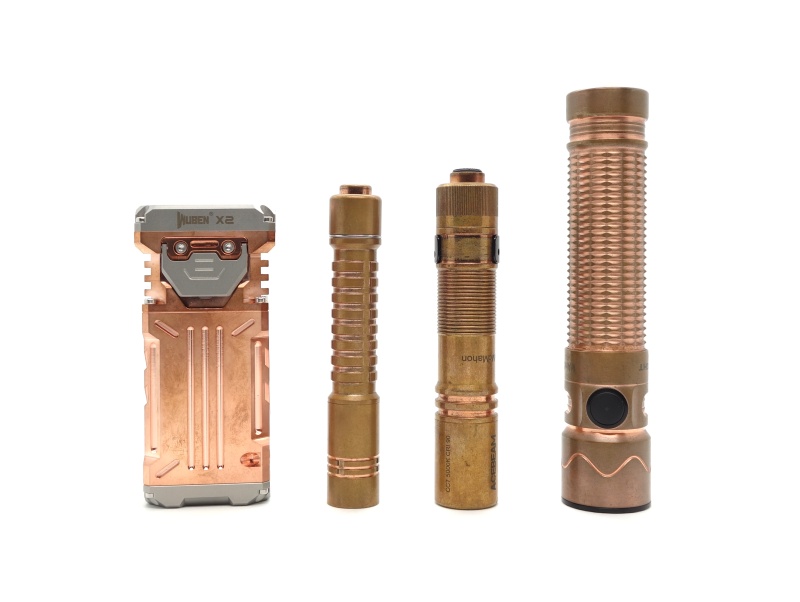
From left to right: Wuben X2 Copper, ReyLight Pineapple Mini Copper, Acebeam Pokelit AA Copper, Olight Warrior Mini 2 Copper
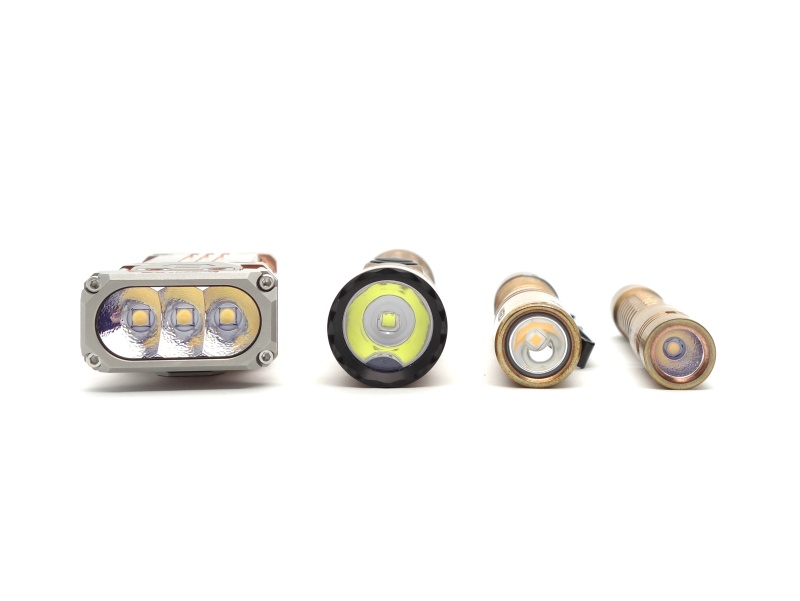
Here are comparison photos where the Wuben X2 Copper has developed a natural patina after a few weeks.
From left to right: Wuben X2 Copper, Olight Warrior Mini 2 Copper, Acebeam Pokelit AA Copper, ReyLight Pineapple Mini Copper
From left to right: Wuben X2 Copper, Olight Warrior Mini 2 Copper, Acebeam Pokelit AA Copper, ReyLight Pineapple Mini Copper
User interface#
The Wuben X2 has an electronic side switch. It is relatively easy to use. Click on, click off. Hold to change modes.
There are three main modes: Low, Med and High. And shortcuts to: Turbo, Strobe and SOS.
| State | Action | Result |
|---|---|---|
| Off | Hold | Low |
| Off | Click | On (mode memory) |
| Off | Two clicks | Turbo |
| Off | Three clicks | Strobe |
| Off | Four clicks | Lock-out |
| On | Hold | Cycle (Low, Med, High) |
| On | Click | Off |
| On | Two clicks | Turbo |
| On | Three clicks | Strobe |
| Lock-out | Click | Battery status indicator blinks three times |
| Lock-out | Four clicks | Low |
| Strobe | Click | On (mode memory) |
| Strobe | Three clicks | SOS |
| SOS | Click | On (mode memory) |
| SOS | Three clicks | Strobe |
| Turbo from off, SOS or Strobe | Two clicks | Turbo |
| Turbo from Low, Med or High | Two clicks | On (mode memory) |
The torch will flash three times when entering lock-out mode.
Mode memory does not include Turbo, SOS or Strobe.
Strobe#
Strobe has an alternating frequency.
Programming mode#
You can adjust the brightness of each Low, Med and High modes as follows:
| Mode | Default | Min (lumens) | Max (lumens) |
|---|---|---|---|
| Low | 5 | 5 | 100 |
| Med | 100 | 100 | 400 |
| High | 400 | 400 | 800 |
To set the brightness for a particular mode:
- Click to turn the torch on.
- Hold and release to select Low, Med or High.
- Click and hold (2H). The brightness will ramp up or down and flash when it reaches the end.
- Release at the desired brightness level.
- Click and hold again to ramp in the opposite direction.
Factory reset#
Enter lockout mode and then:
- Click, (pause for less than 0.5 seconds), Double click (pause for less than 0.5 seconds), Triple click.
The torch will enter reset, exit lockout mode, and enter the lowest mode.
Battery status indication#
The indicator LED near the switch will display the following for 5 seconds when the torch is on:
| Colour | Battery level |
|---|---|
| Blue | Capacity ≥ 90% |
| Blue blinking | 40% ≤ Capacity < 90% |
| Red | 15% ≥ Capacity < 40% |
| Red blinking | Capacity < 15% |
“Red blinking” will continue while the torch is on.
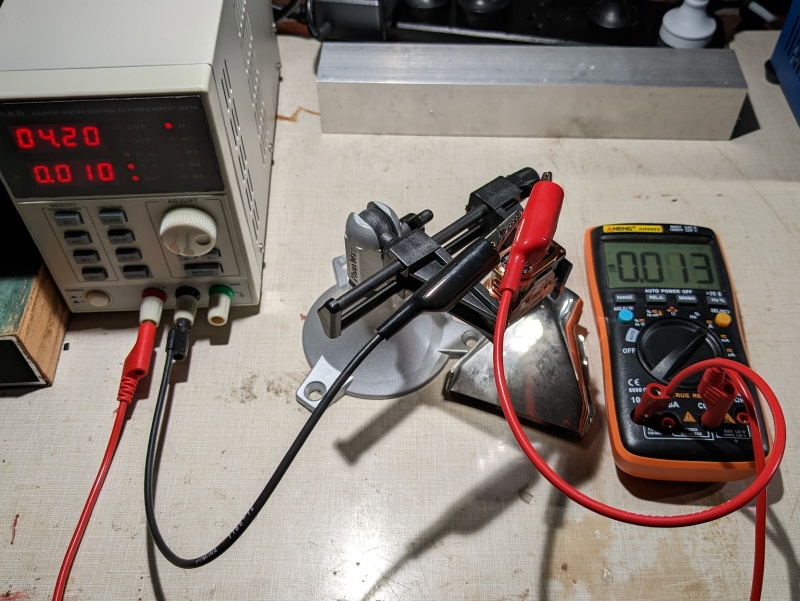
Low voltage protection#
There is low voltage protection. The emitters turned off at 2.76V and the current dropped to 1.1 mA.
I tested low voltage protection by connecting the driver of the torch to a bench power supply and then by lowering the voltage from 4.2V to 0V.
Here is a video:
Low voltage protection! Wuben X2 Copper
PWM#
I did not notice any visible PWM (flickering).
What I like about the UI#
- It is relatively easy to use. Click on, click off. Hold to change modes.
What could be improved#
- Direct access to SOS might be nice.
- It would be nice if two clicks while in Turbo always results in the torch exiting Turbo mode. I noticed that the torch remained in Turbo while peforming two clicks after coming from off, Strobe or SOS.
Batteries and charging#
Battery#
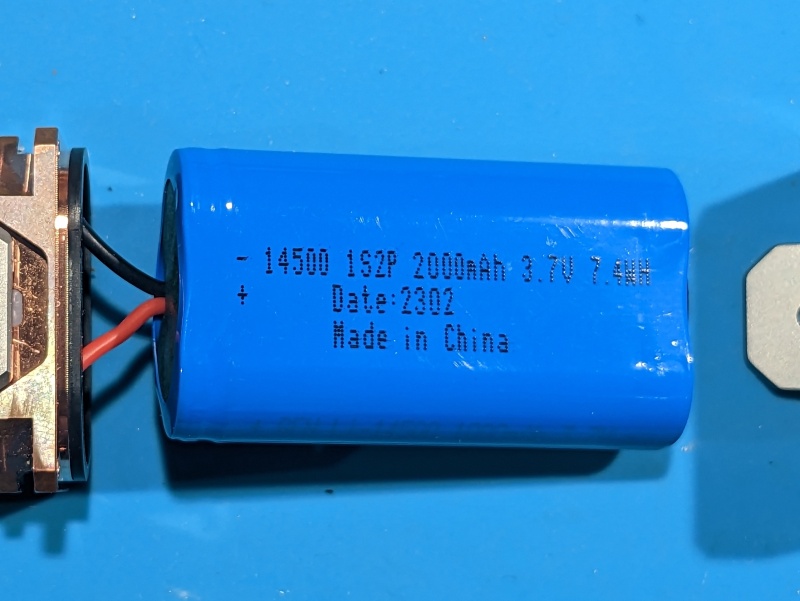
A battery pack has been soldered to the driver. I removed four 1.5 hex screws between the head and the body. And then I desoldered a wire for the battery to measure the standby drain.
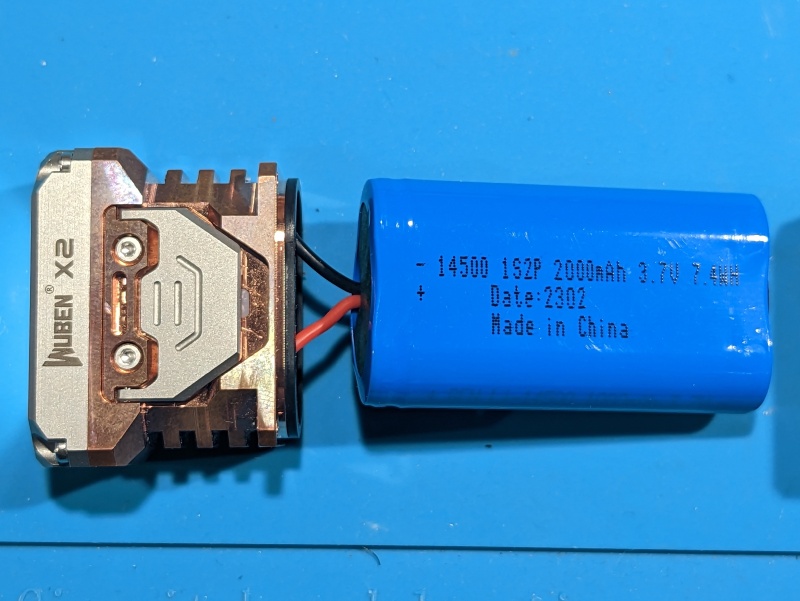
There are two 14500 cells connected in parallel (1S2P) to provide a capacity of 2000mAh.
It would be nice if the 14500 cells could be replaced by the user given that they are in a parallel configuration.
As it is, you would need a soldering iron to install a new battery pack. You would need to either build a new battery pack or find one that fits after a few years of heavy use.
Charging#
The switch flicks up to reveal a USB-C charging port. This does not look very water resistant.

The indicator LED went red while charging and it went blue when charging was complete.
Power supply: PinePower Desktop USB-C
USB Meter: AVHzY CT-3 (recommended by LiquidRetro)
Room temperature: 18 C
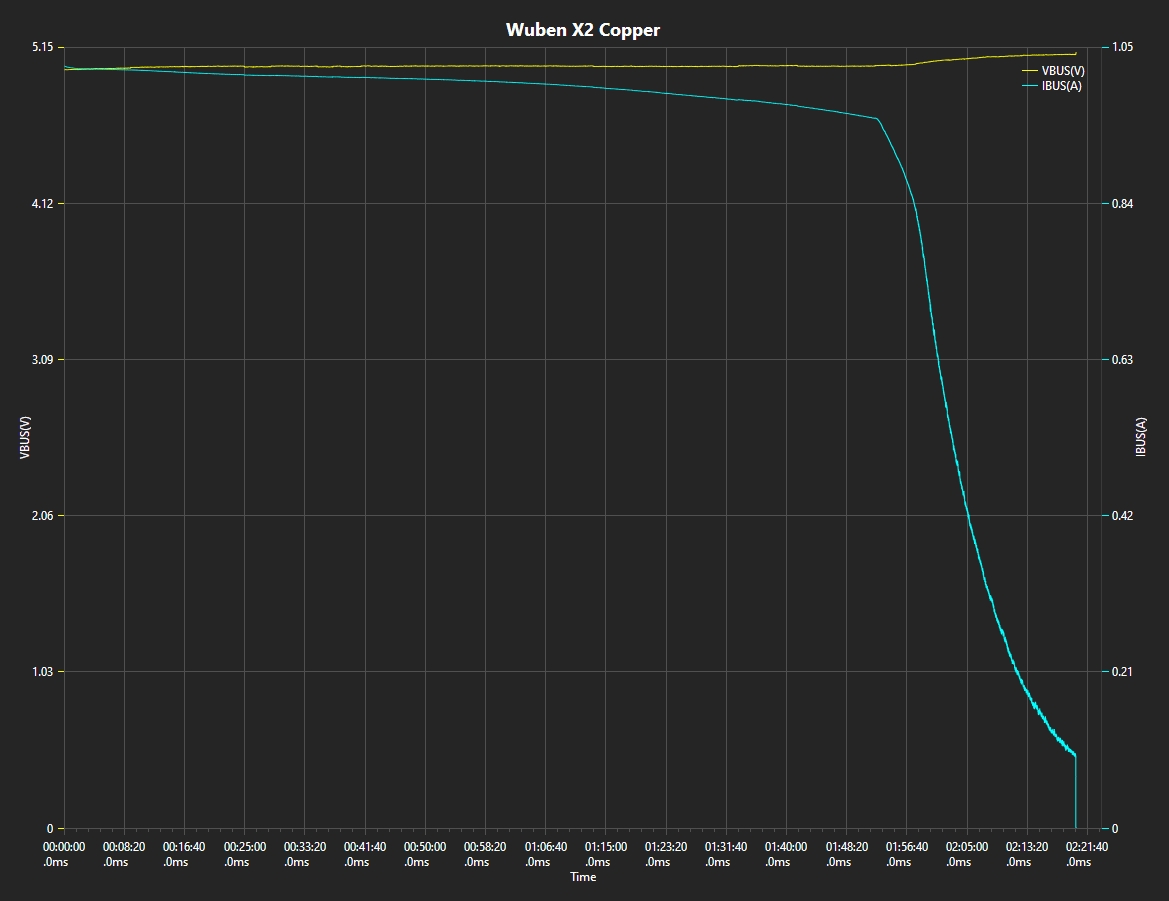
Charging completed after 2 hours 21 minutes. The charging rate was approximately 5V 1A.
Power supply compatibility#
I tried the following power supplies with the built-in USB-C charger:
| Power supply | USB Type | Protocol | Does it charge? |
|---|---|---|---|
| Apple 61W Power Adapter | USB-C | PD | Yes |
| Google Pixel Power Adapter | USB-C | PD | Yes |
| PinePower Desktop | USB-C | PD | Yes |
| PinePower Desktop | USB-A | QC | Yes |
| PinePower Desktop | USB-A | Yes |
USB-C to USB-C charging works.
Performance#
Specifications from the manual:
| FL1 STANDARD | Turbo | High | Med | Low | Strobe | SOS |
|---|---|---|---|---|---|---|
| Output (lumens) | 1,800 + 800 | 400 | 100 | 5 | 1,000 | 200 |
| Runtime | 1min + 1h | 2.5h | 10h | 80h | ||
| Beam Distance (metres) | 128 | |||||
| Beam Intensity (cd) | 4,100 |
Lumen measurements#
I used a bench power supply to measure the current at turn on.
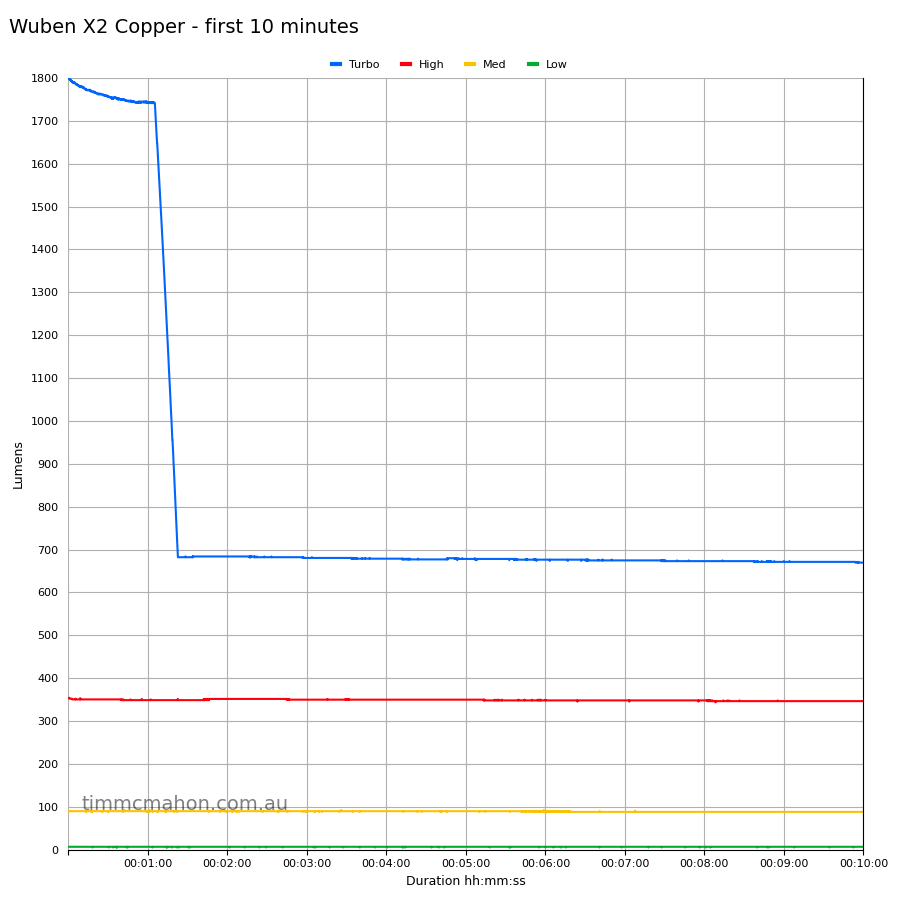
| Mode | Amps at start | Specs | Lumens @turn on | Lumens @30 sec | Lumens @10 min |
|---|---|---|---|---|---|
| Low | 0.01 A | 5 | 6 | 6 | 6 |
| Med | 0.16 A | 100 | 89 | 88 | 88 |
| High | 0.67 A | 400 | 354 | 350 | 346 |
| Turbo | 5+ A | 1,800 | 1,800 | 1,758 | 669 |
My bench power supply is limited to 4.2V 5A. Turbo may exceed 5A.
Standby drain#
29.1 µA
Runtime graphs#
I used my own DIY lumen tube with a TSL2591 sensor and forked bmengineer’s project RuTiTe to record runtimes.
Note: Lumen measurements may be off by 10% with my DIY lumen tube.
The room temperature was approximately 21 C.

Runtime#
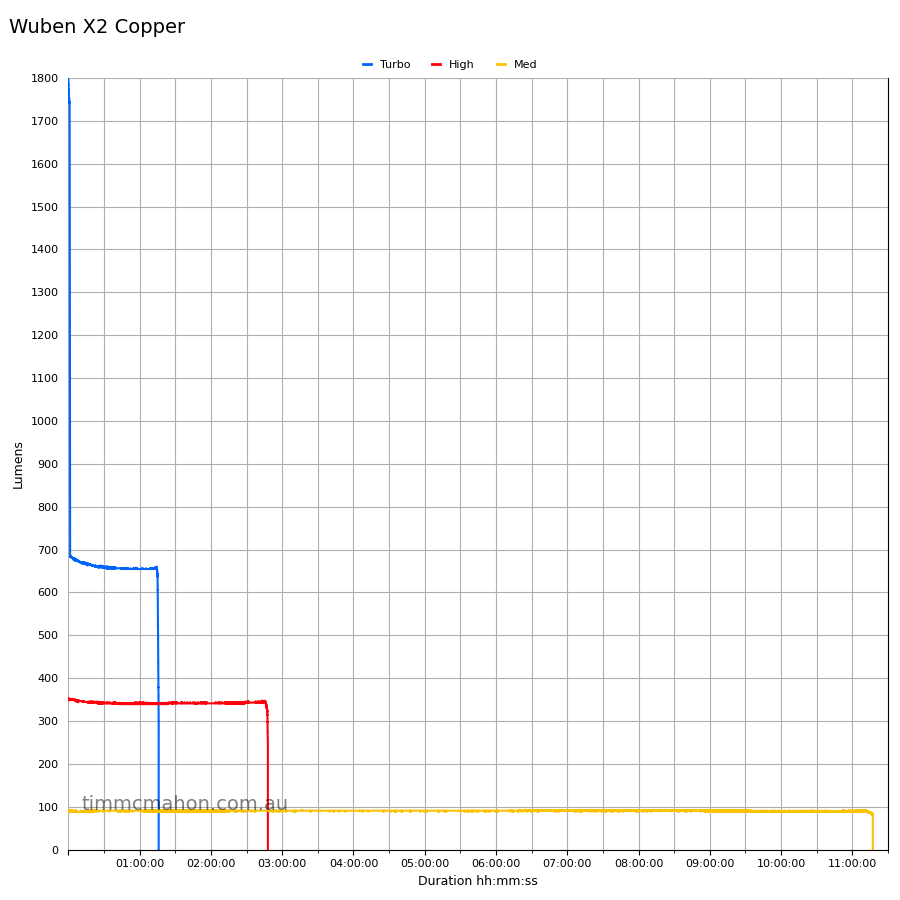
Here is a summary of the runtime results:
| Mode | User manual | Runtime result |
|---|---|---|
| Turbo | 1min + 1h | 1h 16min 1s |
| High | 2h 30min | 2h 47min 52s |
| Med | 10h | 11h 17min 13s |
| Low | 80h | 10min+ |
The runtime result is the time until my lumen tube no longer detects more than 1 lumen.
I stopped recording after 10 minutes for the Low mode.
I was able to turn the torch back on after the Turbo runtime finished. The battery was not completely drained.
Overall, the Wuben X2 Copper performed slightly better than expected.
Throw#
I took lux measurements with a UNI-T UT383BT at 30 seconds. Low was measured at one metre. Med, High and Turbo were measured at five metres.
| Mode | Specs (cd) | Specs (m) | Candela measured (cd) | Distance (m) |
|---|---|---|---|---|
| Low | 12 | 6 | ||
| Med | 200 | 28 | ||
| High | 1,150 | 67 | ||
| Turbo | 4,100 | 128 | 6,150 | 156 |
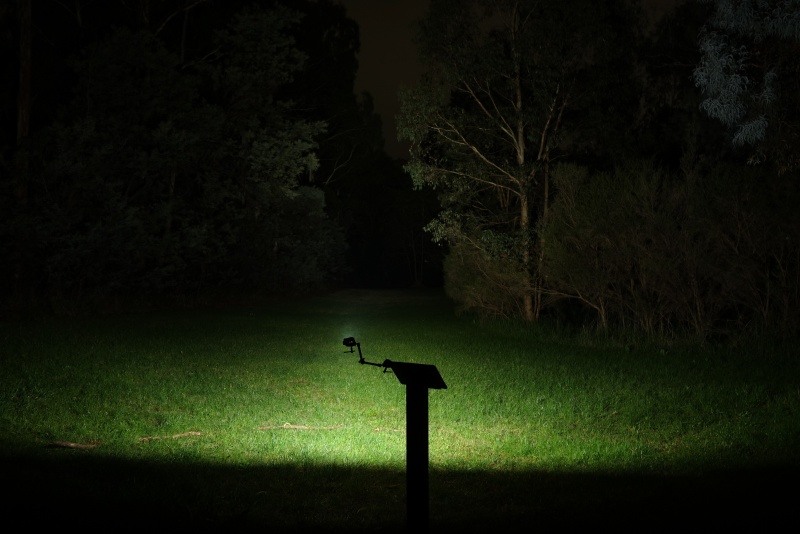
Beamshots#
I went to a local park and aimed the Wuben X2 Copper at a tree 70 metres away while using Turbo.
Beamshots were taken using a Sony RX100M2 using 3.2", f3.2, ISO 100, 5000K WB.
Wuben X2 Copper (Turbo)#
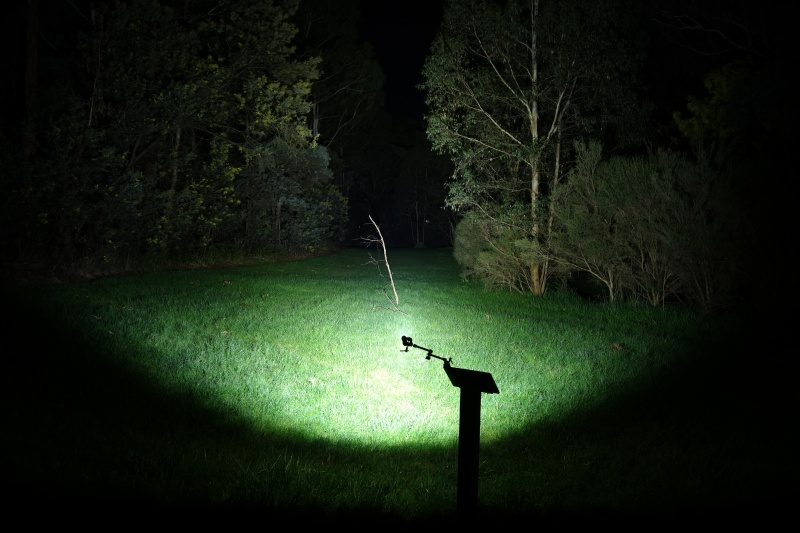
Cyansky P25 V2.0#
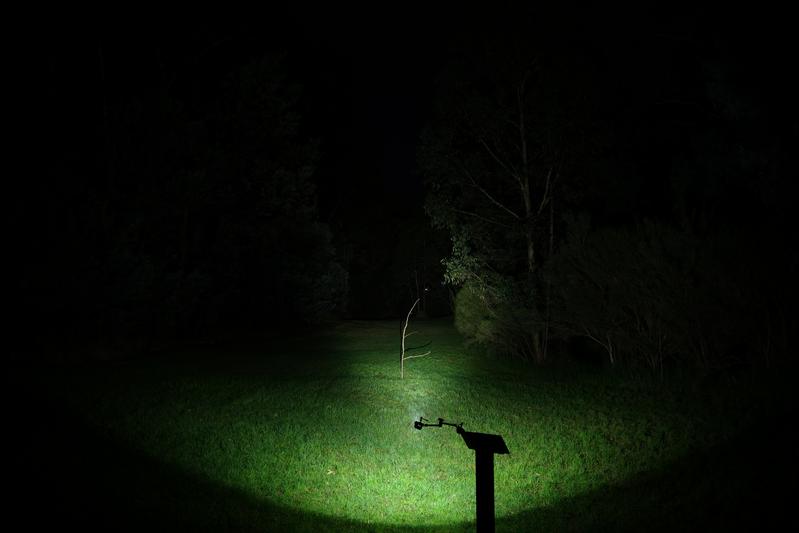
Olight Warrior Mini 2#
Conclusion#
The Wuben X2 Copper performed better than I expected. My expectations were influenced by other enthusiasts and by specifications published by Wuben.
Runtime results and the beam distance results were better than the official specifications.
The choice of emitters, three Samsung LH351Ds, is okay… They produce a very floody beam. But I would love to see Wuben use Nichia 519A emitters so that there is no hint of green in the beam. I am going to be fussy because this torch is aimed at enthusiasts.
That said, the use of screws and rubber gaskets makes it extremely easy to open up and modify the Wuben X2! I am going to swap Nichia 519A emitters into mine.
It would have been nice if Wuben designed the X2 so that two user replaceable 14500 cells could be inserted in parallel. The battery pack can be swapped but you need to know what you are doing.
Copper torches are a bit of a lifestyle choice. They are heavy and stinky but some enthusiasts love them!
If you are not a fan of copper, that is okay! Wuben have the X2 available in aluminium and different titanium variants.
I will probably continue to use the X2 Copper as a work horse to knock around and take an aluminium version while travelling.
Pros:#
- Good build quality.
- Floody beam.
- High CRI.
- Beam looks nice.
- Built-in USB-C charging.
- Low voltage protection.
Cons:#
- Copper has sharp edges.
- Battery pack is soldered to the driver.
- UI bug where I can’t exit Turbo with two clicks from off, Strobe or SOS.
Price#
The Wuben X2 Copper is AU$234.86 after a 20% discount at the time of writing.
Wuben are definitely aiming for enthusiasts with this price.
With a higher price tag come higher expectations. I would expect the copper version to be chamfered at this price but it has a few sharp edges. The aluminium version does not have sharp edges.
The aluminium version is AU$145.68 after a 20% discount at the time of writing.
Product page#
Promo code: SG9IP8YKT5PI
liteshop.com.au affiliate link
Promo code: TIM20
https://www.wubenlight.com/collections/everyday-carry?ref=Tim
I may earn a commission if you use an affiliate link or a promo code. This will help fund future torch reviews and tutorials.
For example:
Low voltage protection! Wuben X2 Copper