LOOP SK05 Helm EDC Torch Review

LOOP SK05 Helm#
- Specifications
- Introduction
- Torch in use
- Build quality
- LED, bezel, lens, reflector and beam
- Size and comparison
- User interface
- Batteries and charging
- Powerbank
- Performance
- Beamshots
- Conclusion
- Price
- Product page
Specifications#
| Brand/model | LOOP SK05 |
|---|---|
| LED | Spotlight (Luminus SFT12R), Floodlight (3*Luminus SST20), RGB Sidelight |
| Maximum lumens | 2,100 lm |
| Maximum beam intensity | 36,100 cd |
| Maximum throw | 380 m |
| Battery | Built-in 6000mAh |
| Onboard charging | Yes (USB-C) |
| Material | Aluminium |
| Modes | Spotlight (4), Floodlight (4) |
| Blinkies | Strobe, SOS |
| Reflector | Smooth (Spotlight), TIR (Floodlight) |
| Waterproof | IP68 |
| Review date | January 2025 |
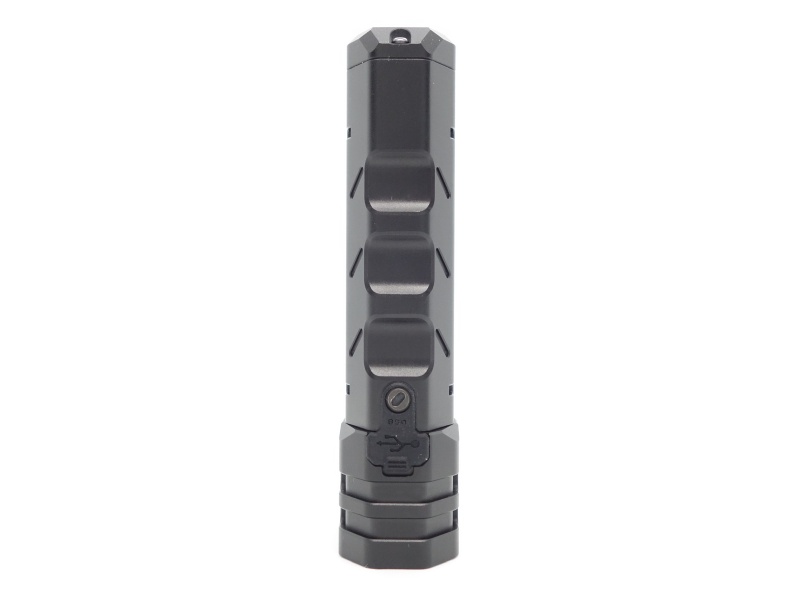
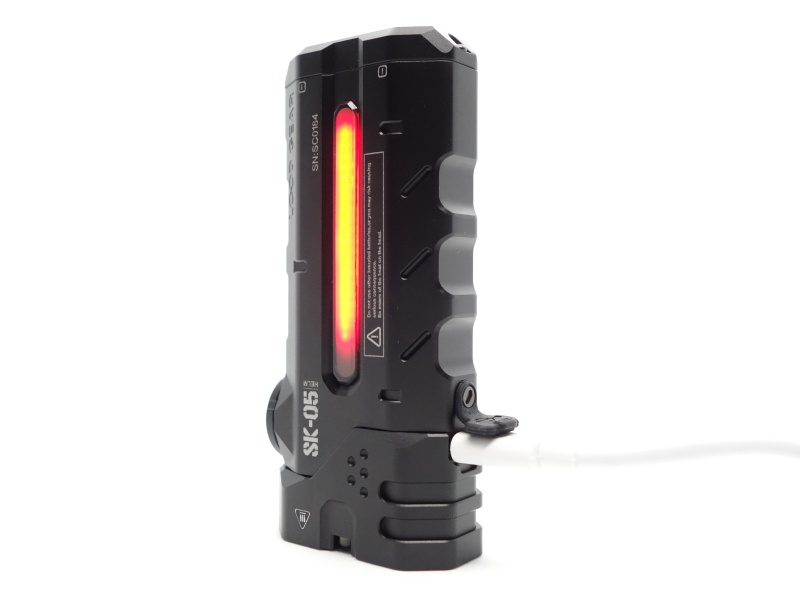
Introduction#
The LOOP SK05 Helm is an EDC torch with a Spotlight, Floodlight and Sidelight. These lights are controlled with an outer ring and a center button. It features fast USB-C charging and it can serve as a powerbank.
This high performance version comes with a Luminus SFT12R emitter and three Luminus SST20 emitters.
Here is a video review:
LOOP kindly sent this torch for review. I have not been paid for this review nor have I held back my opinions of this torch.
Packaging#
The LOOP SK05 comes inside a white box with LOOP branding. The magnetic lid lifts up.

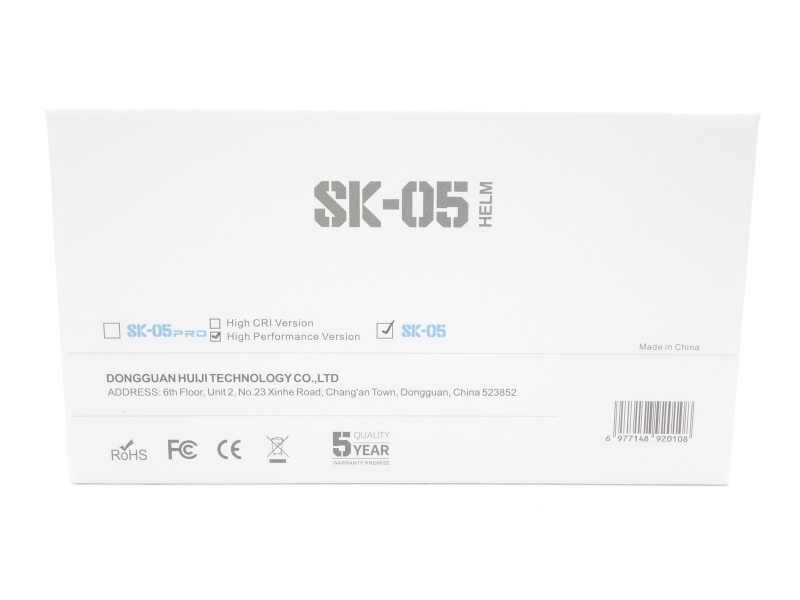


The following was included in the box:
- LOOP SK05.
- USB-C to USB-C charging cable.
- User manual.
There is a strap in the box to help lift the light out.


Torch in use#
The LOOP SK05 feels pretty good to hold. It has a bit of heft to it.
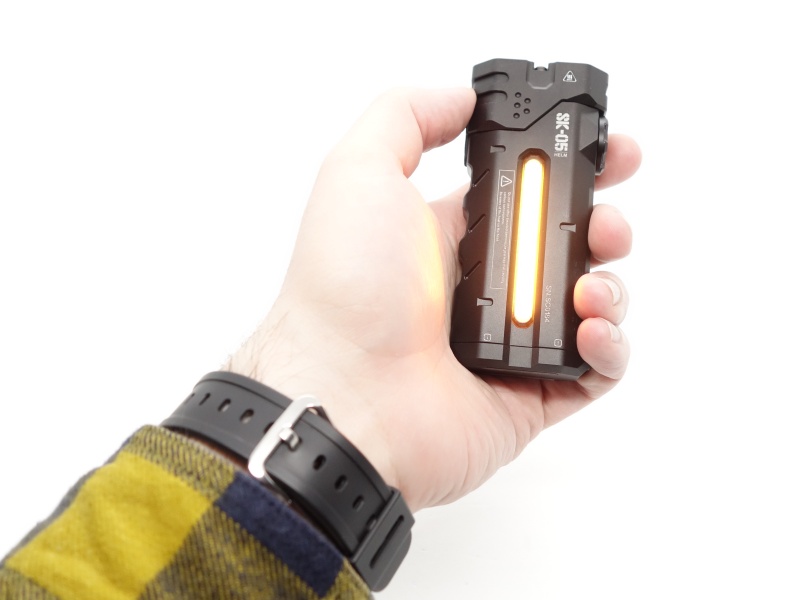
It looks like it has been designed with right-handed people in mind.
My thumb can rest against the center button, or the smooth side of the torch, while my fingers rest naturally against three cut outs along the other side of the torch.

The outer ring and the center button are a lot of fun to play with!

There are two magnets in the tail to allow the torch to be used as a work light. But I would take care because the torch has a bit of weight to it and it might fall off a metal surface. It will support itself at a 90 degree angle but a slight knock could topple it over.
The tail has two rubber strips to help protect a surface. These strips are in front of each magnet.

The torch can easily tail stand.
The torch has a lanyard hole and two screw holes for a pocket clip.
Build quality#
The LOOP SK05 is made of aluminium. It has a matte black anodised finish.
There is a magnet in the outer ring to select a particular mode (Lock, Floodlight, Spotlight, Sidelight).
The center button gives a satisfying click for an e-switch.


A pocket clip was not included with the early sample that I received.

The quality of the outer ring feels good. It feels like there is a ball bearing that clicks into place while rotating it.
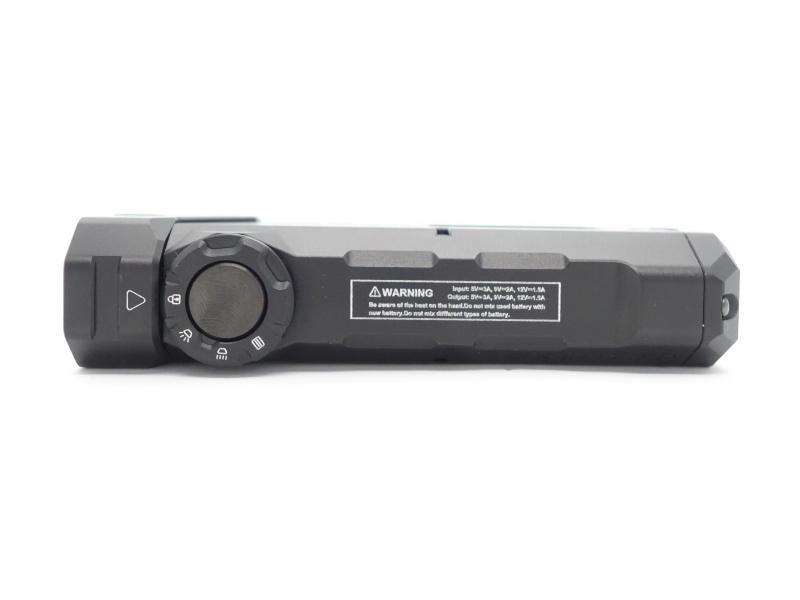
The USB-C cover has been securely screwed into place.
The aluminium housing of the light has been designed to help the USB-C cover sit flush to help avoid accidentally opening the cover. Again, this is nice attention to detail.

A 1.5 hex driver can be used to remove two screws from the tail and open the battery compartment. The SK05 Pro has a latch that can be used to access the battery compartment instead.
The battery compartment has enough room for two flat top unprotected 18650 cells to fit side-by-side. I doubt that protected button top cells would fit.
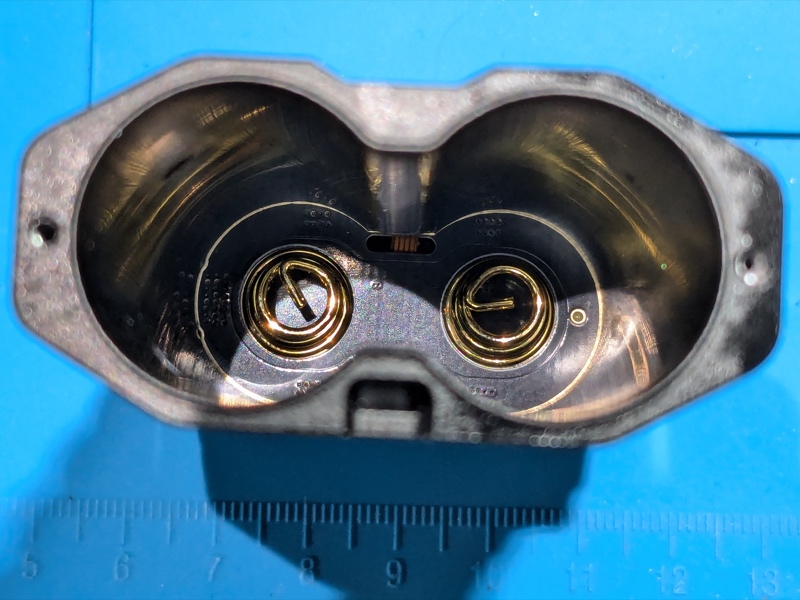

It looks like two screws in the tail are used to complete the circuit. This reminds me of the design of the Sofirn BS01 and the Sofirn IF24. I am not a big fan of this approach. The connectivity could be improved. The SK05 Pro has a dedicated contact point in the tailcap to improve connectivity.
I had to temporarily connect the torch to a USB-C charger to get it to wake up and start working again. It works fine with the USB-C cable disconnected. I asked LOOP and they confirmed that this is expected behaviour.
Teardown#
I do not recommend trying to disassemble the LOOP SK05.
I unscrewed two long screws that held the head of the torch to the body of the torch and then I pulled the head off.
I ended up ripping out three wires and a ribbon cable. The ribbon cable was damaged.


The black circle bit of the side switch was inside the aluminium hole of the head. So the switch was damaged when I ripped the head off.


I ended up snapping the switch off and ripping off a pad from the PCB when I attempted to bend the switch back into place.


In hindsight, it may be safer to use a suction device or a piece of plastic to pull the circular button cover out (it does not appear to be locked in place with a snap ring). And then use a thin screwdriver to push the switch down so that it doesn’t get caught in the hole of the head when pulling the head off.
It is probably only safe to pull the head off by about 30mm before the wires rip off the PCB.
The ribbon cable could be unclipped from the head. And three wires could be desoldered from the other PCB.
Again, I do not recommend trying to disassemble the LOOP SK05. I am just sharing my findings so that you do not make the same mistakes.
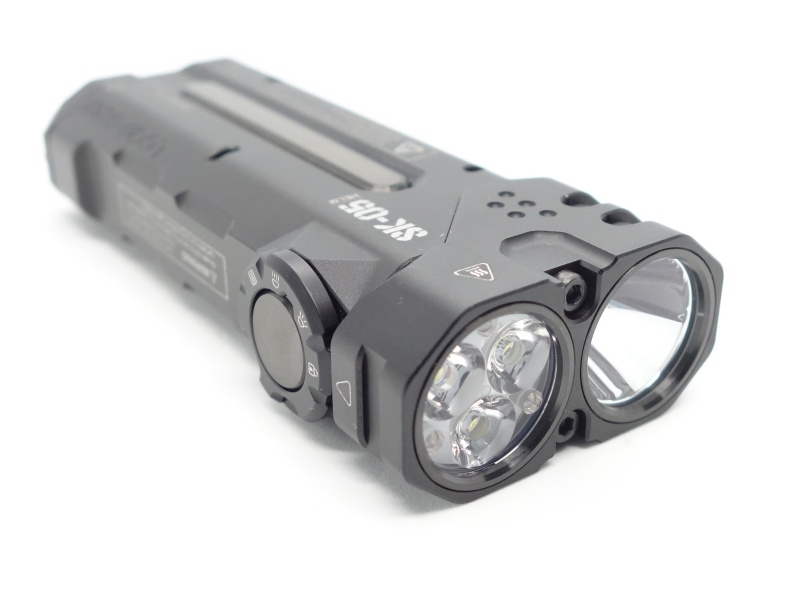
LED, bezel, lens, reflector and beam#
The LOOP SK05 has a Spotlight with one cool white Luminus SFT12R, a Floodlight three cool white Luminus SST20, and an RGB Sidelight.
The Floodlight has a TIR optic without glass in front of it. I scratched the TIR optic with a knife to check.
The Spotlight has a glass lens pressed against a smooth reflector. The reflector is centered with a gasket around the SFT12R.


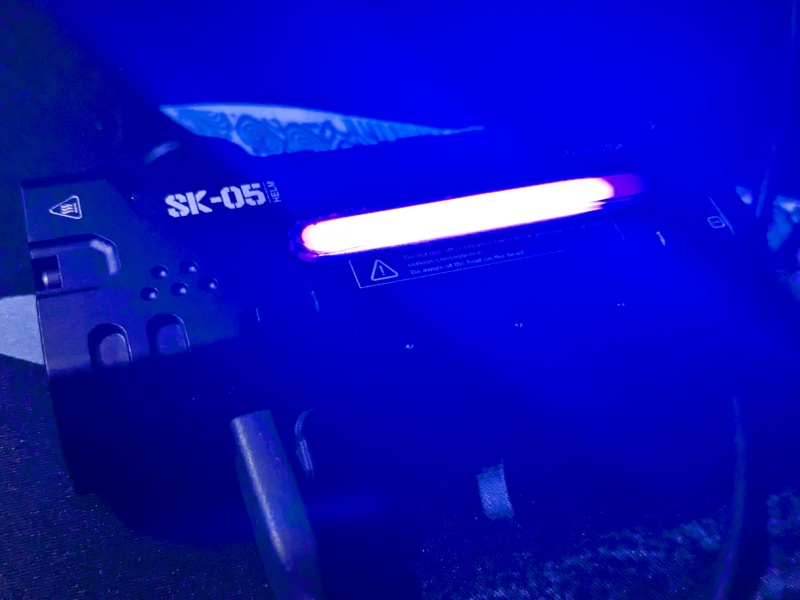
The Sidelight has seven special modes and it can serve as a status indicator for the battery, while charging, or while using the torch as a powerbank.
- Constant Night Light: This is a neutral white light where the brightness can be changed to Low, Med and High.
- Colored Constant Light: Red, Orange, Yellow, Green, Ice Blue, Blue or Purple can be selected.
- Colored Breathing Light: This is like the Colored Constant Light but the light gradually fades in and out.
- Coloured Streamline Light: This is like the Colored Constant Light but the light scrolls slowly across the strip.
- Colored Dropflow Light: This is like the Colored Constant Light but short droplets of light scroll across the strip.
- Flowing Rainbow Light: The colours of the rainbow scroll across. The speed can be adjusted (Slow, Medium, Fast).
- Police flash: Red and blue lights flash.

The center button can be pressed to toggle this status indicator off and on.
There is a flexible PCB in the battery compartment connecting the Sidelight to the driver.
CCT, CRI, and duv#
I have taken Correlated Colour Temperature (CCT) and Colour Rendering Index (CRI, RA of R1-R8) measurements with the torch positioned one metre away from an Opple Light Master Pro III (G3). Turbo (spotlight) was measured at 1.2 metres.
The CCT is around 6200K, the CRI is around 68 and the Delta u, v is positive (slightly green) on lower modes and closer to pure white on Turbo for the spotlight.
The CCT is around 5700K, the CRI is around 65 and the Delta u, v is positive (slightly green) for the floodlight.
The beam produced by the spotlight has a narrow intense white hotspot surrounded by small corona with a hint of green and a wide spill. The smooth reflector creates a sharp edge around the spill.
The beam produded by the floodlight has a wide intense white hotspot that blends smoothly into a slightly purple. The TIR optic helps focus the beam without creating a sharp edge.
| LED | Mode | CCT (K) | CRI (Ra) | x | y | Duv |
|---|---|---|---|---|---|---|
| Spotlight | Low | 5971 | 66.4 | 0.3216 | 0.3475 | 0.0082 |
| Spotlight | Med | 6153 | 67.2 | 0.3182 | 0.3413 | 0.0067 |
| Spotlight | High | 6314 | 68.2 | 0.3154 | 0.3365 | 0.0057 |
| Spotlight | Turbo | 6620 | 70.2 | 0.3109 | 0.3266 | 0.0029 |
| Floodlight | Low | 5598 | 64.2 | 0.3300 | 0.3589 | 0.0099 |
| Floodlight | Med | 5758 | 65.5 | 0.3263 | 0.3522 | 0.0083 |
| Floodlight | High | 5727 | 65.3 | 0.3270 | 0.3534 | 0.0086 |
| Floodlight | Turbo | 5713 | 65.5 | 0.3273 | 0.3533 | 0.0084 |
Calculate Duv from CIE 1931 xy coordinates
Dimensions and size comparison#
Dimensions#
I took the following measurements using a digital caliper.
| Measurement | Unit (mm) |
|---|---|
| Length | 106.09 |
| Height | 24.50 |
| Width | 48.20 |
Weight#
I took the following measurements using a digital scale.
| Weight | Unit (g) |
|---|---|
| Torch | 215.72 |
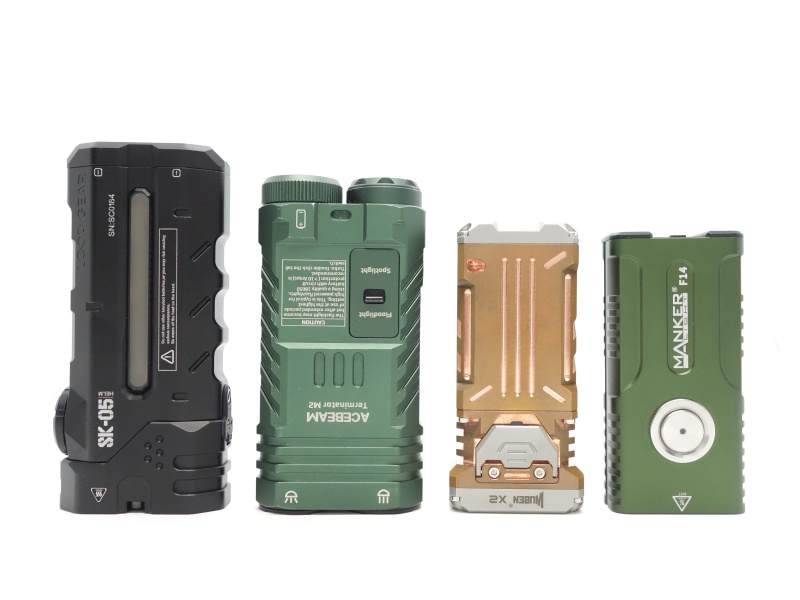
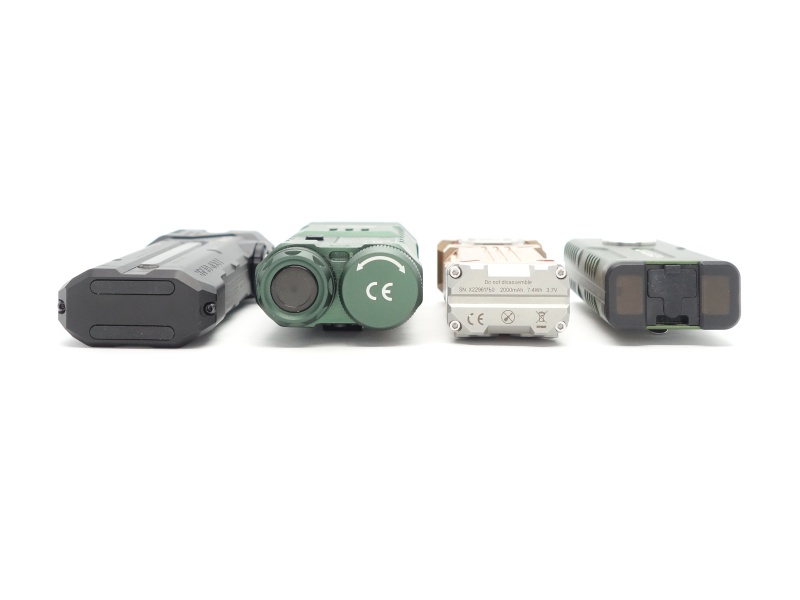
Size comparison with its competition#
From left to right: LOOP SK05, Acebeam M2, Wuben X2 Copper, Manker F14
From left to right: LOOP SK05, Acebeam M2, Wuben X2 Copper, Manker F14

From left to right: LOOP SK05, Acebeam M2, Wuben X2 Copper, Manker F14
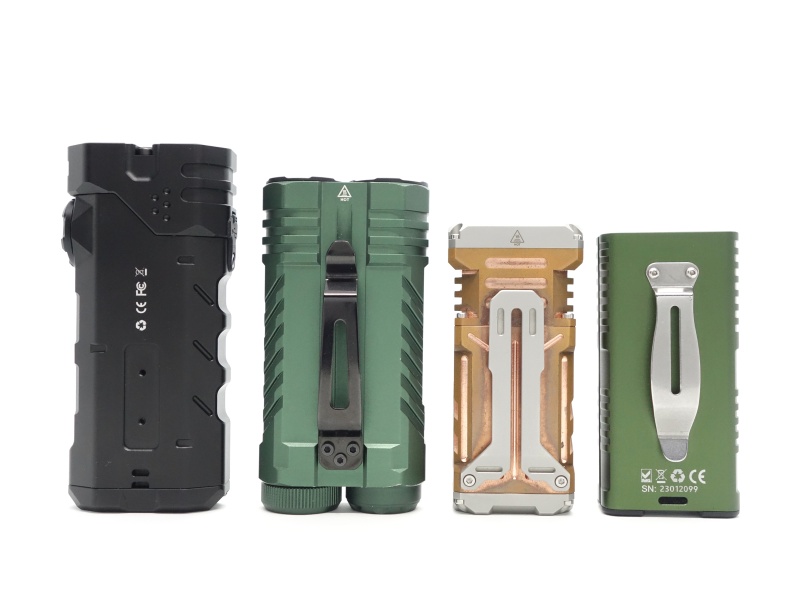
From left to right: LOOP SK05, Acebeam M2, Wuben X2 Copper, Manker F14
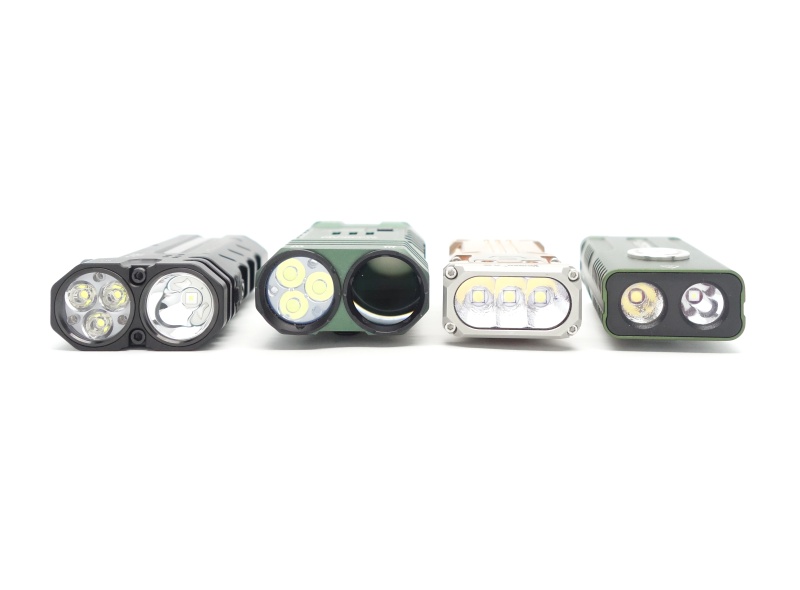
From left to right: LOOP SK05, Acebeam M2, Wuben X2 Copper, Manker F14
User interface#
The LOOP SK05 has an outer ring with a center button in the middle.
The outer ring can be used to select:
- Lock
- Floodlight
- Spotlight
- Sidelight
The center button can be pressed to turn the light on and off, adjust the brightness, and change modes.
There are three modes in the main cycle group for the floodlight and the spotlight: Low, Med and High.
| Outer ring | State | Center button | Result |
|---|---|---|---|
| Lock | Off | Press and hold | Nothing |
| Lock | Off | Click | Nothing |
| Lock | Off | Two clicks | Nothing |
| Floodlight | Off | Press and hold | Momentary Turbo (Floodlight and Spotlight) |
| Floodlight | Off | Click | On (memory) |
| Floodlight | On | Click | Off |
| Floodlight | Any | Two clicks | Turbo |
| Floodlight | Any | Three clicks | Strobe |
| Floodlight | Strobe, SOS | Press and hold | Cycle (Strobe, SOS) |
| Floodlight | Strobe, SOS | Three clicks | On (memory) |
| Spotlight | Off | Press and hold | Momentary Turbo (Floodlight and Spotlight) |
| Spotlight | Off | Click | On (memory) |
| Spotlight | On | Click | Off |
| Spotlight | Any | Two clicks | Turbo |
| Spotlight | Any | Three clicks | Strobe |
| Spotlight | Strobe, SOS | Press and hold | Cycle (Strobe, SOS) |
| Spotlight | Strobe, SOS | Three clicks | On (memory) |
| Sidelight | Off | Press and hold | Momentary Turbo (Floodlight and Spotlight) |
| Sidelight | Off | Click | On (memory) |
| Sidelight | On | Click | Off |
| Sidelight | Any | Three clicks | Police flash |
| Sidelight | On | Two clicks | Cycle (Constant Night Light, Colored Constant Light, Colored Breathing Light, Coloured Streamline Light, Colored Dropflow Light, Flowing Rainbow Light) |
| Sidelight | Constant Night Light | Press and hold | Cycle (Low, Med, High) |
| Sidelight | Colored Constant Light | Press and hold | Cycle (Red, Orange, Yellow, Green, Ice Blue, Blue, Purple) |
| Sidelight | Colored Breathing Light | Press and hold | Cycle (Red, Orange, Yellow, Green, Ice Blue, Blue, Purple) |
| Sidelight | Colored Dropflow Light | Press and hold | Cycle (Red, Orange, Yellow, Green, Ice Blue, Blue, Purple) |
| Sidelight | Flowing Rainbow Light | Press and hold | Cycle (Slow, Medium, Fast) |
Mode memory#
Low, Med and High are memorised for the spotlight and the floodlight. If you turn the light off and on while using Turbo then it will change to the last used mode (Low, Med or High).
The last used mode for the sidelight is memorised.
The brightness, colour and speed of each of the six sidelight modes are also memorised.
If you switch between spotlight and floodlight while using Turbo then Turbo will remain on. Similarly, if the the spotlight is on while switching to the sidelight then the sidelight will turn on.
Strobe#
Both the spotlight and the floodlight flash when Strobe mode is activated.
Strobe appears to have a constant frequency.
Strobe, SOS

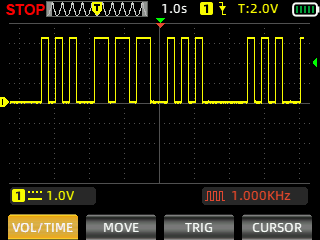
I measured Strobe and SOS of the light with a Zoyi ZT-703S oscilloscope using High Speed mode.
Battery level indicator#
The sidelight acts as battery level indicator. See the user manual for more info.
Low voltage protection#
I have not tested low voltage protection.
What I like about the UI#
- I like the ergonomics of the center button and the outer ring while operating it with my right thumb.
- The output level is the same when switching between floodlight and spotlight.
- The sidelight modes are memorised.
- Shortcut to Turbo from off (two clicks in floodlight or spotlight mode).
- Shortcut to Strobe from off (three clicks in floodlight or spotlight mode).
- Shortcut to Police flash from off (three clicks in sidelight mode).
- The light remains off while rotating the dial but I wish that the battery status indicator remained off too.
What could be improved#
- A shortcut to Low from off would be nice (e.g. hold the button). This is essential when there is mode memory. Holding the button from off currently activates Turbo where both the spotlight and the floodlight turn on.
- A shortcut to Momentary Low from off would be nice (e.g. hold the button in Lock mode).
- It would be nice if clicking the button once while in Lock mode caused the battery status indicator to appear momentarily. I would prefer this instead of the battery status indicator appearing while changing the outer ring from Lock mode to Floodlight to Spotlight while the light is off. This causes the battery status to display twice.
Batteries and charging#
Battery#
The LOOP SK05 comes with two unprotected 18650 cells built-in with a combined capacity of 6000mAh.
The cells are connected in parallel and they can be replaced by unscrewing the tailcap.

Charging#
The LOOP SK05 has built-in USB-C charging. It supports USB-C PD and USB-C QC.
Power supply: PinePower Desktop USB-C
USB Meter: ChargerLAB Power-Z KM003C
Room temperature: 18 C

I charged the torch with the built-in USB-C charger.
It took a little over 2 hours to fully charge the torch at a rate of 12V/1.6A.
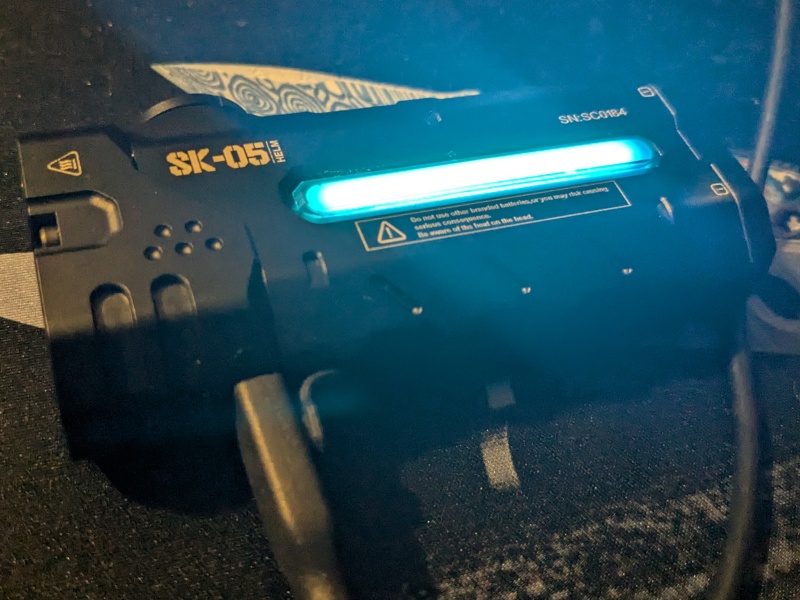
The sidelight acts as a charging status indicator.
| Status | Sidelight | Battery level |
|---|---|---|
| Fully Charged | Solid blue | 100% |
| Charging | Purple scrolling forward | > 95% |
| Charging | Red scrolling forward | 0 - 95% |

The charging status indicator can be turned off by pressing and holding the center button.
Powerbank#
The sidelight acts as a discharging status indicator.
| Status | Sidelight |
|---|---|
| Discharging | Blue scrolling backward |

The discharging status indicator can be turned off while charging a device by pressing and holding the center button.
Power supply compatibility#
I tried the following power supplies with the built-in USB-C charger:
| Power supply | USB Type | Protocol | Does it charge? |
|---|---|---|---|
| Apple 61W Power Adapter | USB-C | PD | Yes |
| Google Pixel Power Adapter | USB-C | PD | Yes |
| PinePower Desktop | USB-C | PD | Yes |
| PinePower Desktop | USB-A | QC | Yes |
| PinePower Desktop | USB-A | Yes |
USB-C to USB-C charging works.
Performance#
Specifications from the user manual:
| Spotlight | Turbo | High | Med | Low |
|---|---|---|---|---|
| Output (lumens) | 750 | 200 | 60 | 10 |
| Runtime | 9h 30min | 10h | 40h | >20 days |
| Beam Distance (metres) | 380 | |||
| Beam Intensity (cd) | 36,100 |
| Floodlight | Turbo | High | Med | Low |
|---|---|---|---|---|
| Output (lumens) | 2,100 | 650 | 150 | 20 |
| Runtime | 6h 30min | 7h | 24h | >20 days |
| Beam Distance (metres) | 180 | |||
| Beam Intensity (cd) | 8,100 |
| Sidelight | On |
|---|---|
| Runtime | >20 days |
Lumen measurements#
Note: Lumen measurements may be off by 10% with my DIY lumen tube. Output measured from TIR optics may be lower than normal with my lumen tube.
| LED | Mode | Specs | Lumens @turn on | Lumens @30 sec | Lumens @10 min |
|---|---|---|---|---|---|
| Spotlight | Low | 10 | 11 | 11 | 11 |
| Spotlight | Med | 60 | 52 | 50 | 50 |
| Spotlight | High | 200 | 185 | 183 | 178 |
| Spotlight | Turbo | 750 | 850 | 797 | 178 |
| Floodlight | Low | 20 | 25 | 23 | 23 |
| Floodlight | Med | 150 | 155 | 155 | 151 |
| Floodlight | High | 660 | 497 | 489 | 472 |
| Floodlight | Turbo | 2,150 | 2,441 | 2,284 | 477 |
The lumen output for High (Floodlight) is slightly lower than expected (489 insitead of 660 lm at 30 seconds). The other modes were pretty close to what LOOP claimed.
Standby drain#
I have not measured the standby drain.
Runtime graphs#
I used my own DIY lumen tube with a TSL2591 sensor and forked bmengineer’s project RuTiTe to record runtimes.
The room temperature was approximately 18 C.


Runtime#
Here is a summary of the runtime results:
| LED | Mode | User manual | Runtime | Turn off |
|---|---|---|---|---|
| Spotlight | Turbo | 9h 30min | 13h 46min 34s | 16h 57min 13s |
| Spotlight | High | 10h | 16h 54min 29s | 16h 54min 29s |
| Spotlight | Med | 40h | 10min+ | 10min+ |
| Spotlight | Low | >20 days | 10min+ | 10min+ |
| Floodlight | Turbo | 6h 30min | 6h 5min 24s | 7h 51min 15s |
| Floodlight | High | 7h | 7h 51min 8s | 7h 51min 8s |
| Floodlight | Med | 24h | 24h+ | 24h+ |
| Floodlight | Low | >20 days | 10min+ | 10min+ |
“Runtime” is the time until the output reduces to 10% of the output at 30 seconds (as per the ANSI/PLATO FL1 2019 Standard).
“Turn off” is the time until my DIY lumen tube no longer detects more than one lumen.
“+” indicates that the light remained on after recording had stopped.
Turbo (Floodlight) fell slightly short by about 25 minutes, lasting 6h 5min 24s before it droppede to 10% of the output that was measured at 30 seconds.
The runtimes for the other modes that I measured lasted much longer than expected.
The output for Turbo quickly dropped within the first minute.
It would be nice if the output did not gradually get dimmer and dimmer over time.
Throw#
I took lux measurements with a UNI-T UT383BT at 30 seconds. Low and Med for the floodlight and Low for the spotlight were measured at one metre. Other modes were measured at five metres.
| LED | Mode | Specs (cd) | Specs (m) | Candela measured (cd) | Distance (m) |
|---|---|---|---|---|---|
| Spotlight | Low | 539 | 46 | ||
| Spotlight | Med | 3,300 | 114 | ||
| Spotlight | High | 11,675 | 216 | ||
| Spotlight | Turbo | 36,100 | 380 | 45,175 | 425 |
| Floodlight | Low | 146 | 24 | ||
| Floodlight | Med | 930 | 60 | ||
| Floodlight | High | 2,875 | 107 | ||
| Floodlight | Turbo | 8,100 | 180 | 13,750 | 234 |
The beam distance is better than expected.
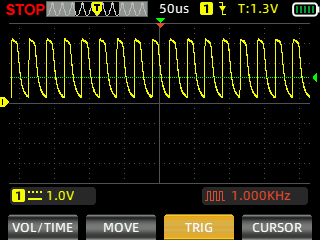
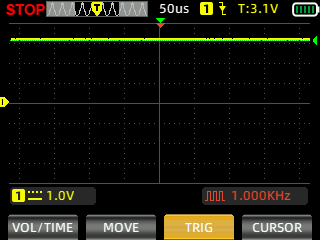
Pulse Width Modulation#
I did not notice any visible PWM (flickering).
I measured the PWM of the light with a Zoyi ZT-703S oscilloscope.
Spotlight (Low, Med, High, Turbo)


Floodlight (Low, Med, High, Turbo)


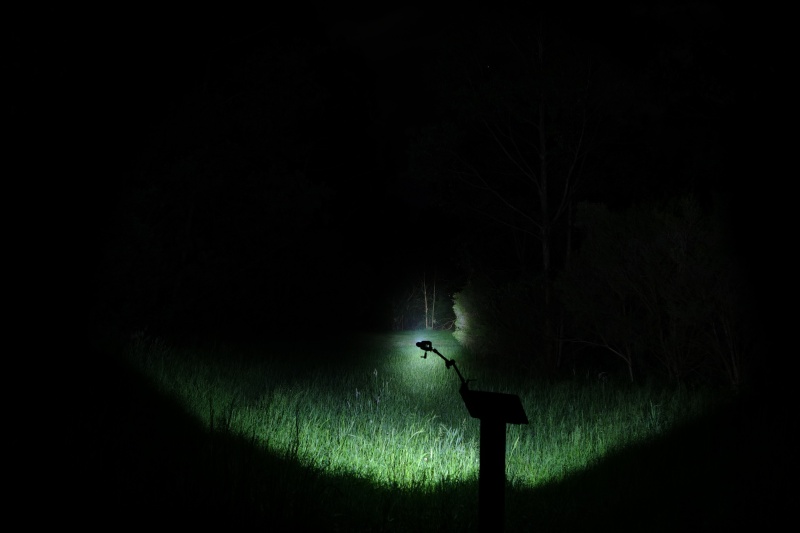
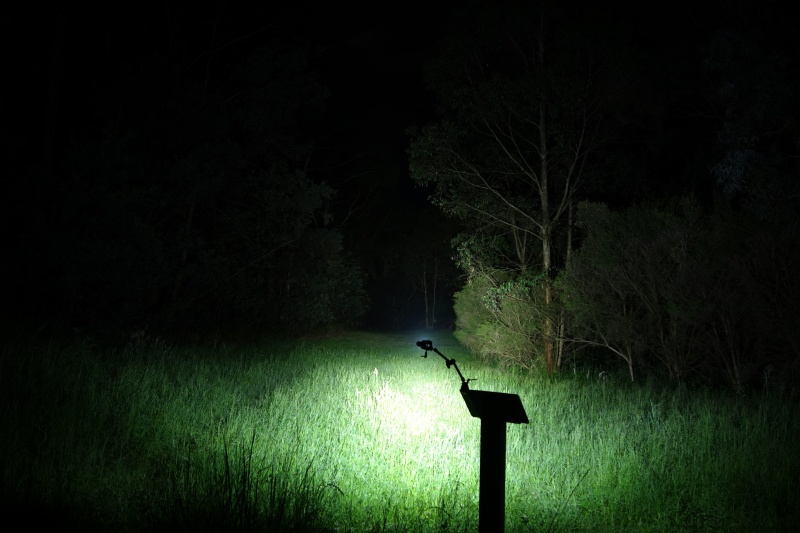
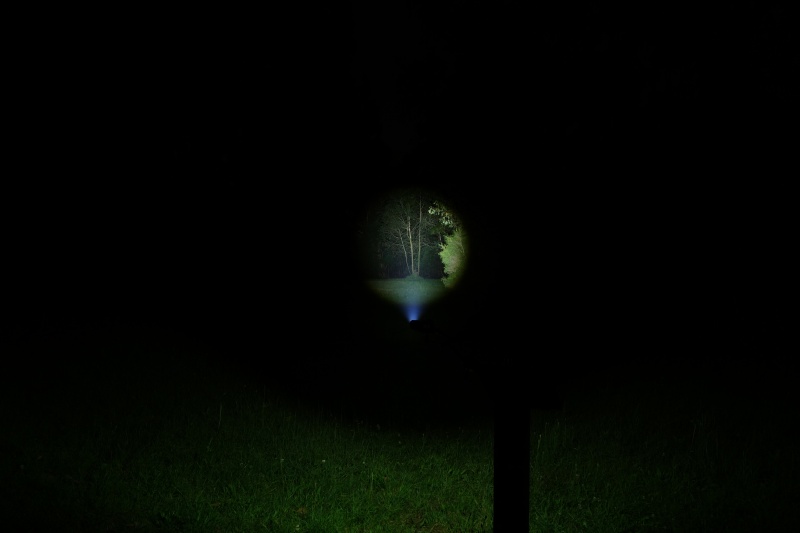
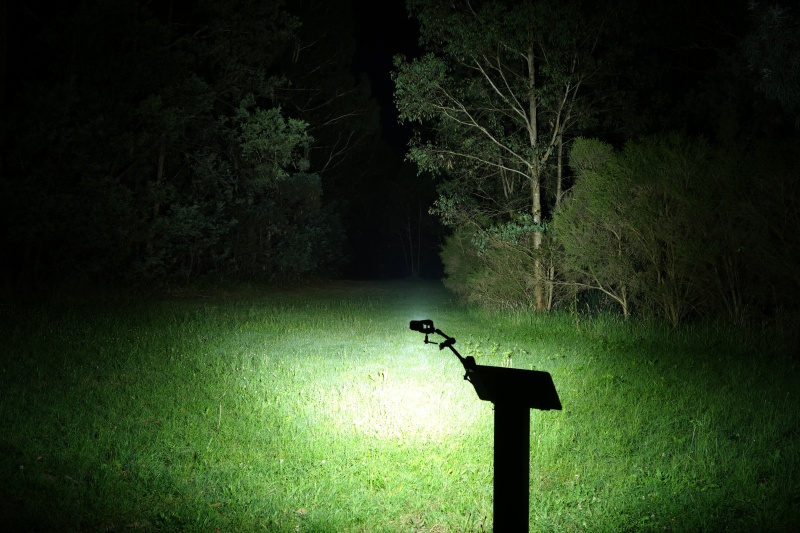
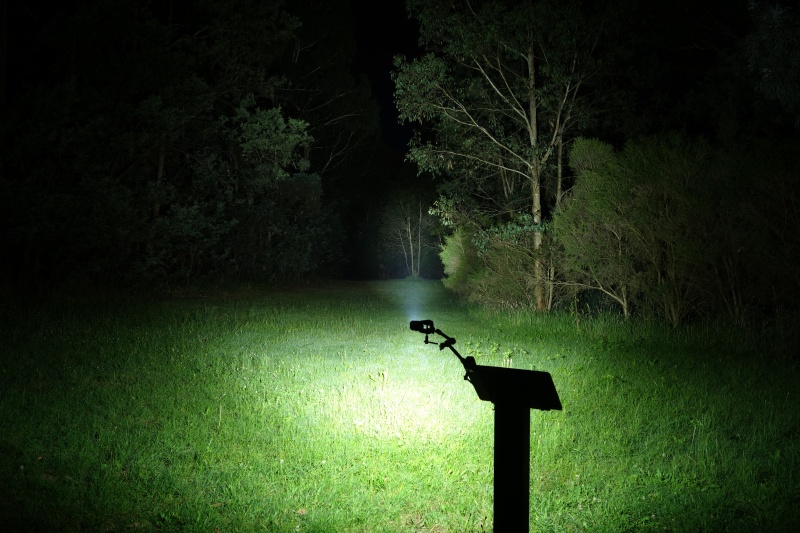
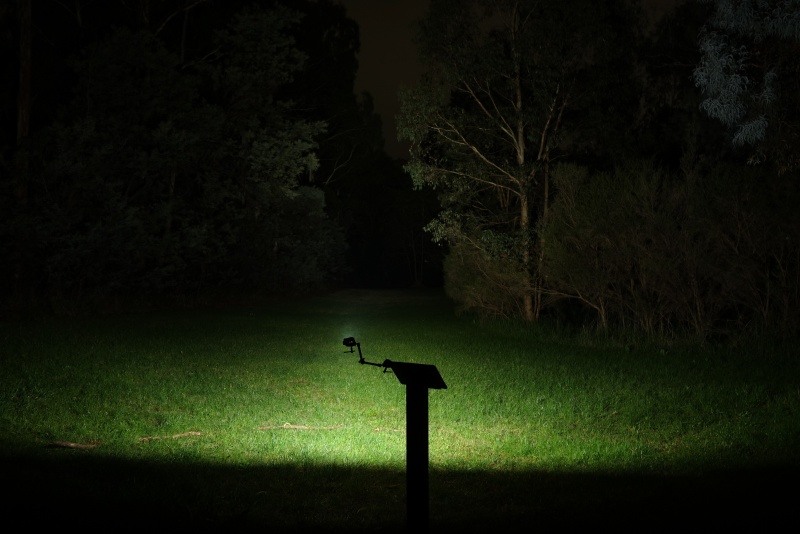
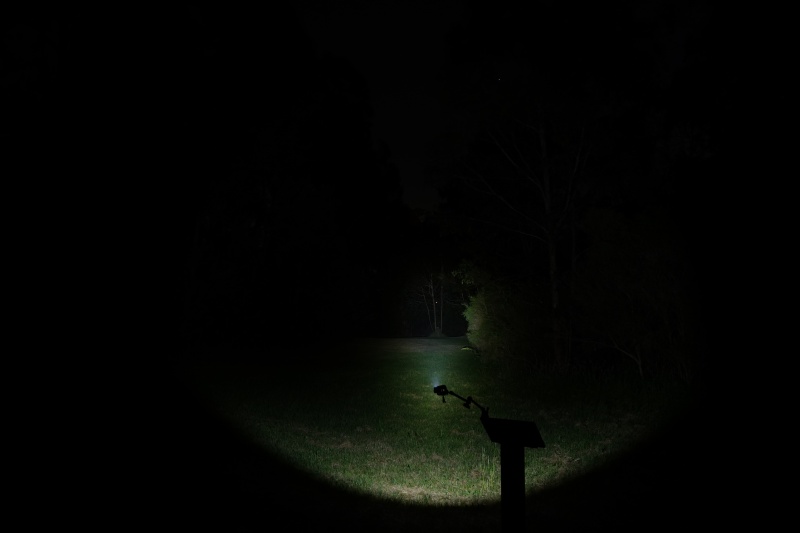
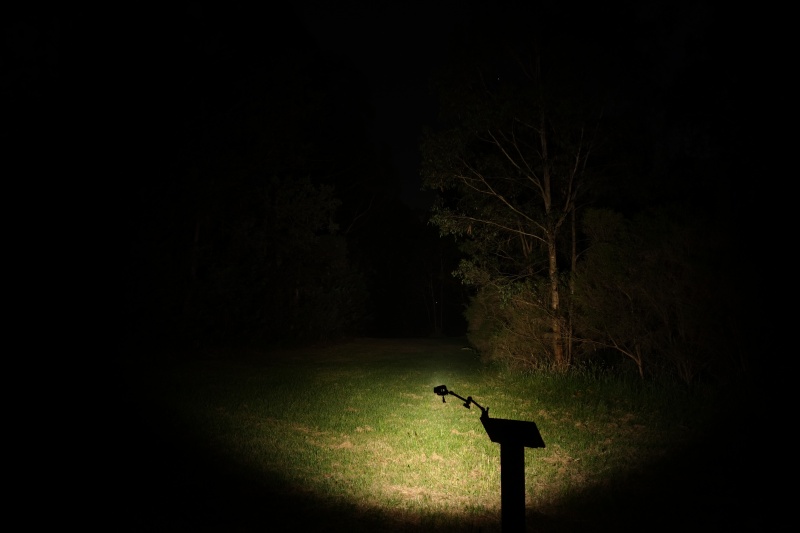
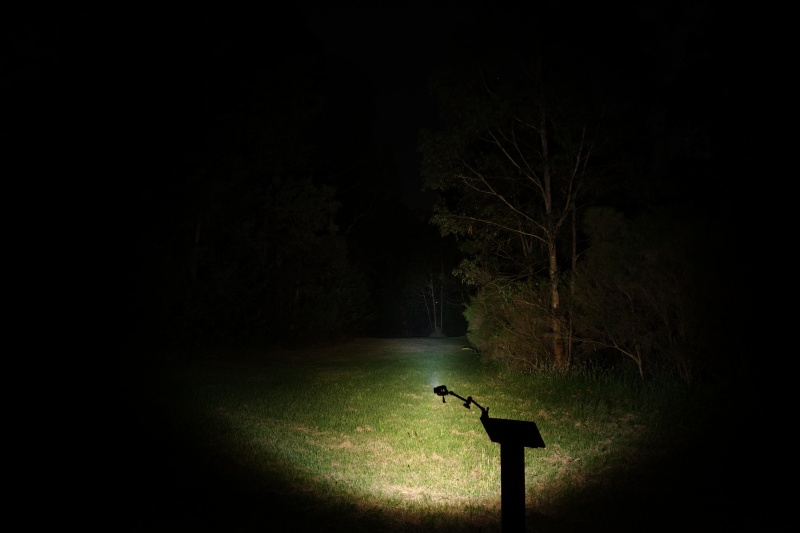
Beamshots#
I went to a local park and I aimed the torch at a tree 70 metres away.
Beamshots were taken using a Sony RX100M2 using 3.2", f3.2, ISO 100, 5000K WB.
LOOP SK05 Spotlight (Turbo)#
LOOP SK05 Floodlight (Turbo)#
Acebeam M2 Spotlight (High)#
Acebeam M2 Floodlight (Turbo)#
Acebeam M2 Both (High)#
Wuben X2 Copper (Turbo)#
Manker F14 Spotlight (Turbo)#
Manker F14 Floodlight (Turbo)#
Manker F14 Both (Turbo)#
Conclusion#
The LOOP SK05 is a nice alternative to the Acebeam M2.
They both have a floodlight and a spotlight.
There are extra features that the LOOP SK05 has to make it better for EDC:
- RGB sidelight.
- USB-C charging.
- USB-C powerbank.
- Two batteries for more capacity.
- Magnets in the tail.
- An optional holster.
The Acebeam M2 arguably has a better spotlight and better output regulation. It would be even better if the LOOP SK05 had well regulated output. The brightness gradually drops over time.
I like the user interface but it is not perfect. A shortcut to Low from off would be nice.
The button with a rotary switch around it makes it simple to control the torch.
The LOOP SK05 is definitely built for enthusiasts.
I would recommend checking out the LOOP SK05 Pro and seeing whether it is worth the upgrade:
- It is much brighter.
- Three Luminus SST25 or Nichia 519A emitters for the floodlight instead of Luminus SST20.
- It has a longer beam distance.
- Luminus SFT25R emitter for the spotlight instead of a Luminus SFT12R.
- The battery compartment has a clip to more easily access the batteries.
Pros:#
- Good build quality.
- Good runtimes.
- Good beam distance.
- USB-C charging.
- Powerbank.
- Simple user interface.
Cons:#
- No shortcut to Low from off.
- Driver. Brightness gradually gets dimmer over time.
Price#
The LOOP SK05 is US$99 at loopgear.com (affiliate link)
The LOOP SK05 Pro is US$149 at loopgear.com (affiliate link)
Product page#
The SK05 should have a 35% coupon code on the product page at launch on 14th January 2025.
The SK05 Pro should have a 20% coupon code on the product page at launch on 14th January 2025.
Here is an extra 5% coupon code: tim
LOOP SK05 at loopgear.com (affiliate link)
LOOP SK05 Pro at loopgear.com (affiliate link)
Each Amazon product page should have a 25% coupon code.
Here is an extra 5% coupon code: RZVKLID4
LOOK SK05 at amazon.com (affiliate link)
LOOP SK05 Pro at amazon.com (affiliate link)
I may earn a commission if you use an affiliate link or a promo code. This will help fund future torch reviews and tutorials.